
Flutter, which can be used to create attractive, natively-built applications for mobile, desktop, and the web from a single codebase, is essentially Google’s portable user interface (UI) toolkit. Flutter is open-source, free, and works with already-written code. Due to its simple, yet effective instructions and user-friendly interface, it is used by businesses and developers all over the world.
In this article, I will explain the process of installing Flutter with SDK on Windows.
System Requirements
To install and run Flutter smoothly on Windows, your development environment must meet these minimum requirements :
- Operating systems: Windows 10 or later (64-bit), x86_64 CPU architecture; 2nd generation Intel Core or newer, or AMD CPU with support for a Windows Hypervisor.
- Ram: 4 GB RAM or more.
- Disk Space: 8 GB of available disk space.
- Screen Resolution: 1280 x 800 minimum screen resolution. (optional)
Here is the link for checking system requirements on Windows.
Downloading Flutter
After verifying the system requirements let’s jump into downloading.
Assuming you have already downloaded and installed Android Studio. If you have not installed Android Studio please follow this link before installing Flutter.
Let’s start downloading
STEP 1 ( Downloading )
-
- Open your favorite browser and download Flutter SDK from the link given below.
- Click Here
- On this page, you will get a blue button to download Flutter SDK zip file.

Picture 1

Picture 2
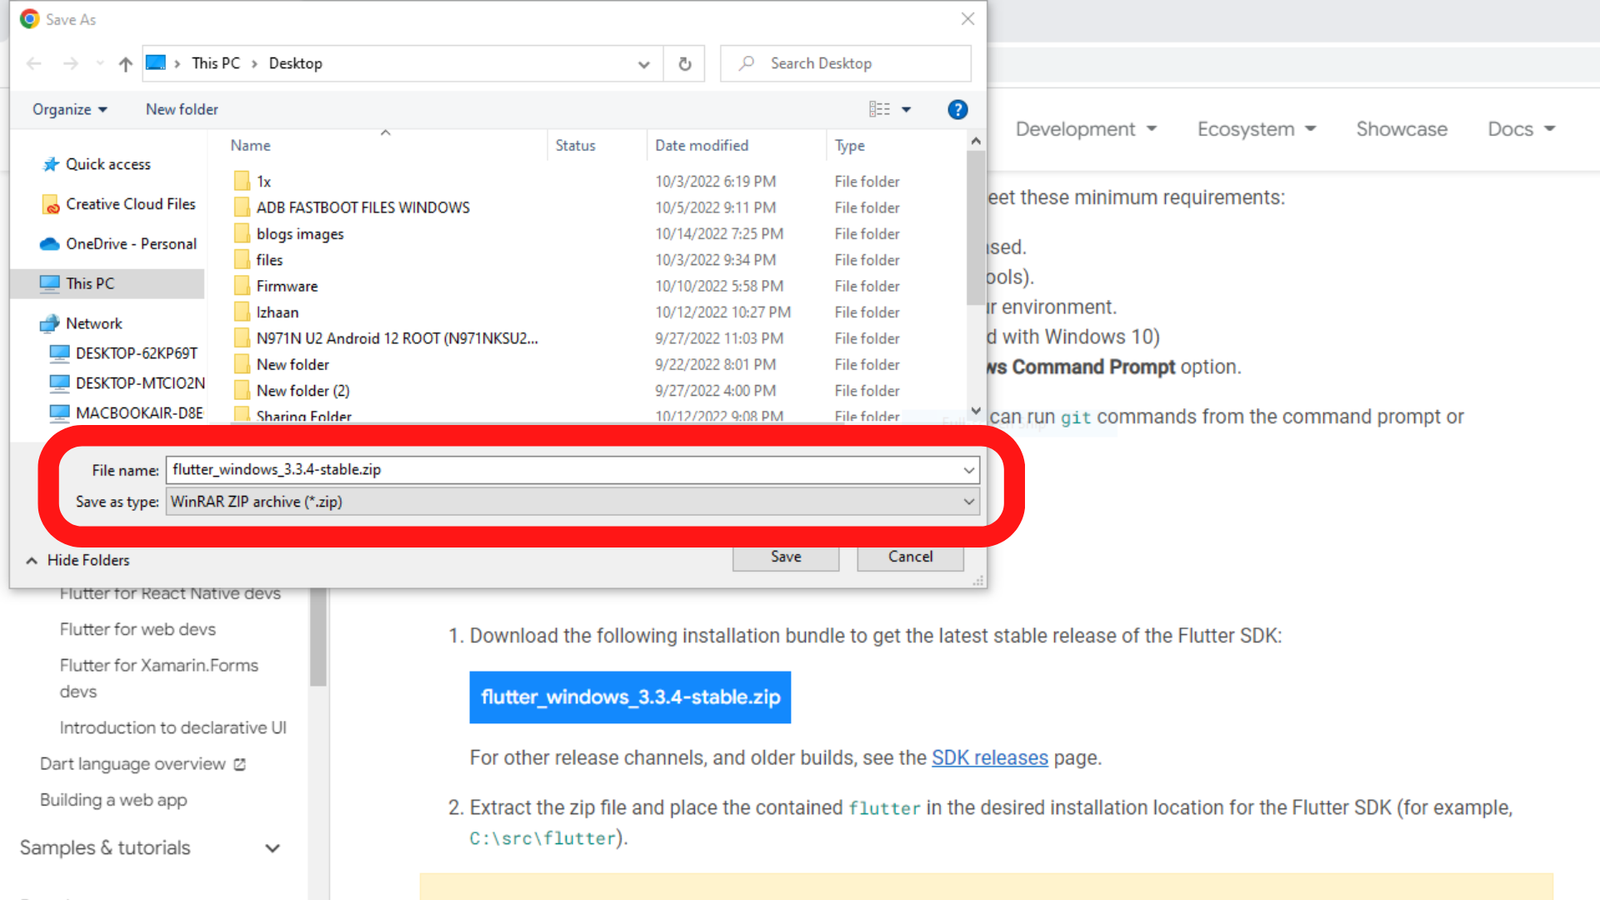
- After clicking on the blue downloading button if your downloading is started automatically then you can skip to Point 6 and Picture 7. If downloading is not started and a dialog box appears then you have to select the folder in which you want to download the Flutter SDK zip file. (Check Picture 4 and 5 for reference)
Picture 3

Picture 4
- Select the folder for downloading the zip file and click on the save button as shown in the picture below.

Picture 5
- Here, you can see SDK zip file is downloading.

Picture 6
- After downloading is done, right-click on the file and click on “Show in folder”.

Picture 7
- Here is the downloaded file. Now “right click” on the file and click on “Extract to” option as shown in picture 9 and wait for the file to complete extraction.

Picture 8

Picture 9
- Extraction is going on wait for 2 to 5 minutes.

Picture 10
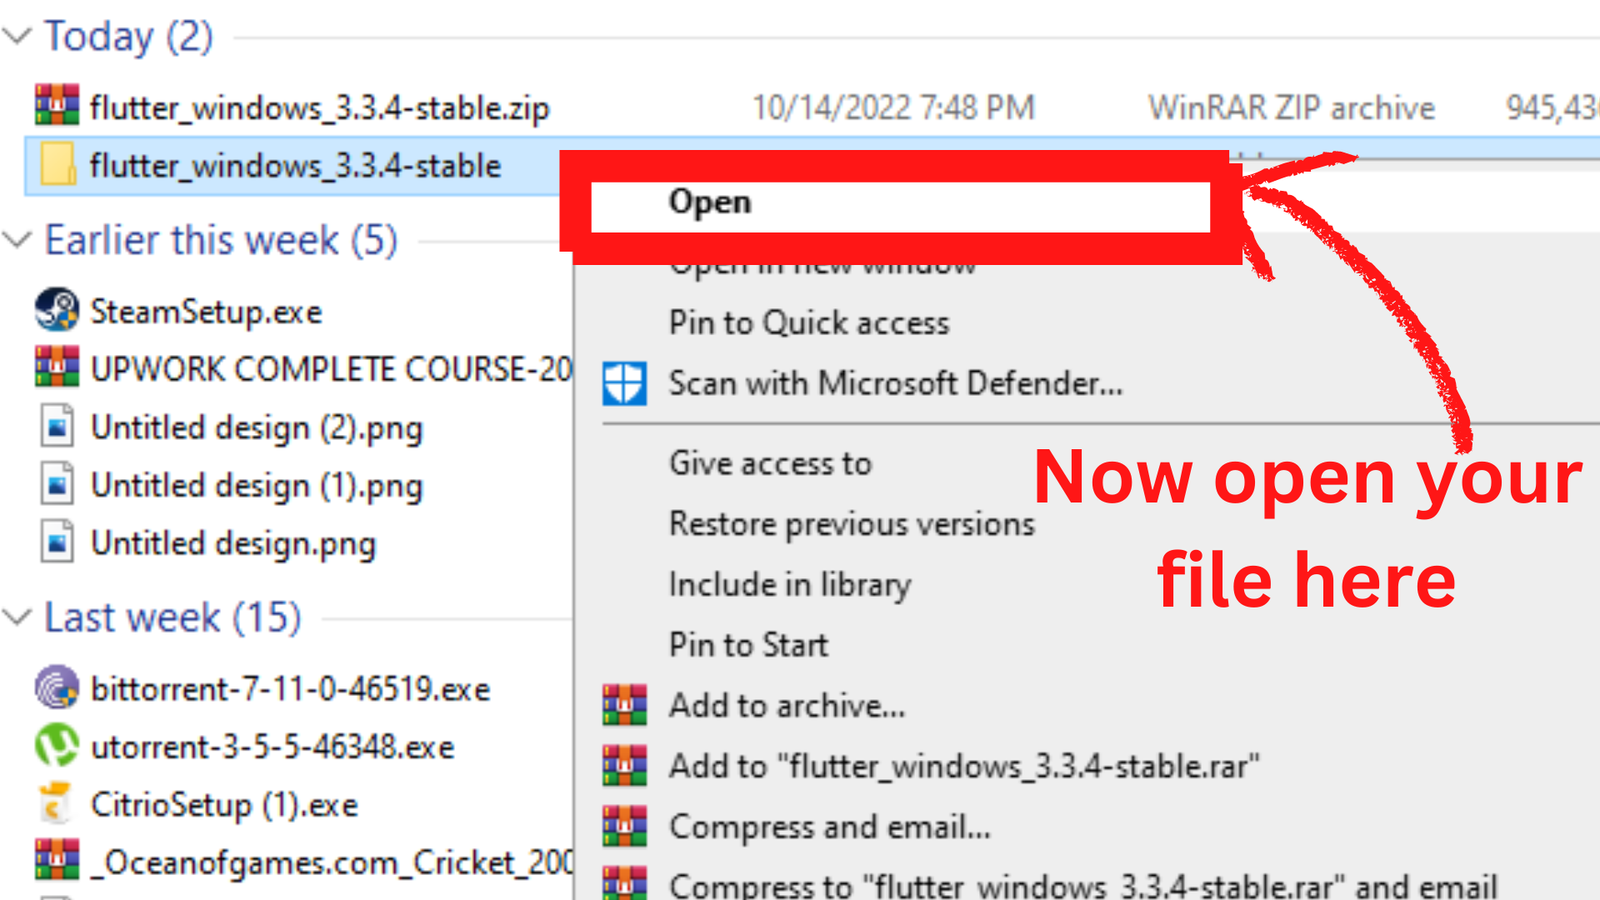
- Now open the extracted folder by right click on it and select “open”.
Picture 11
- After opening the extracted folder, you will see a “flutter” folder in it. You can copy the “flutter” folder to any one of the drives you have.

Picture 12
Eg: I have Local Disk C and Local Disk D

Picture 13
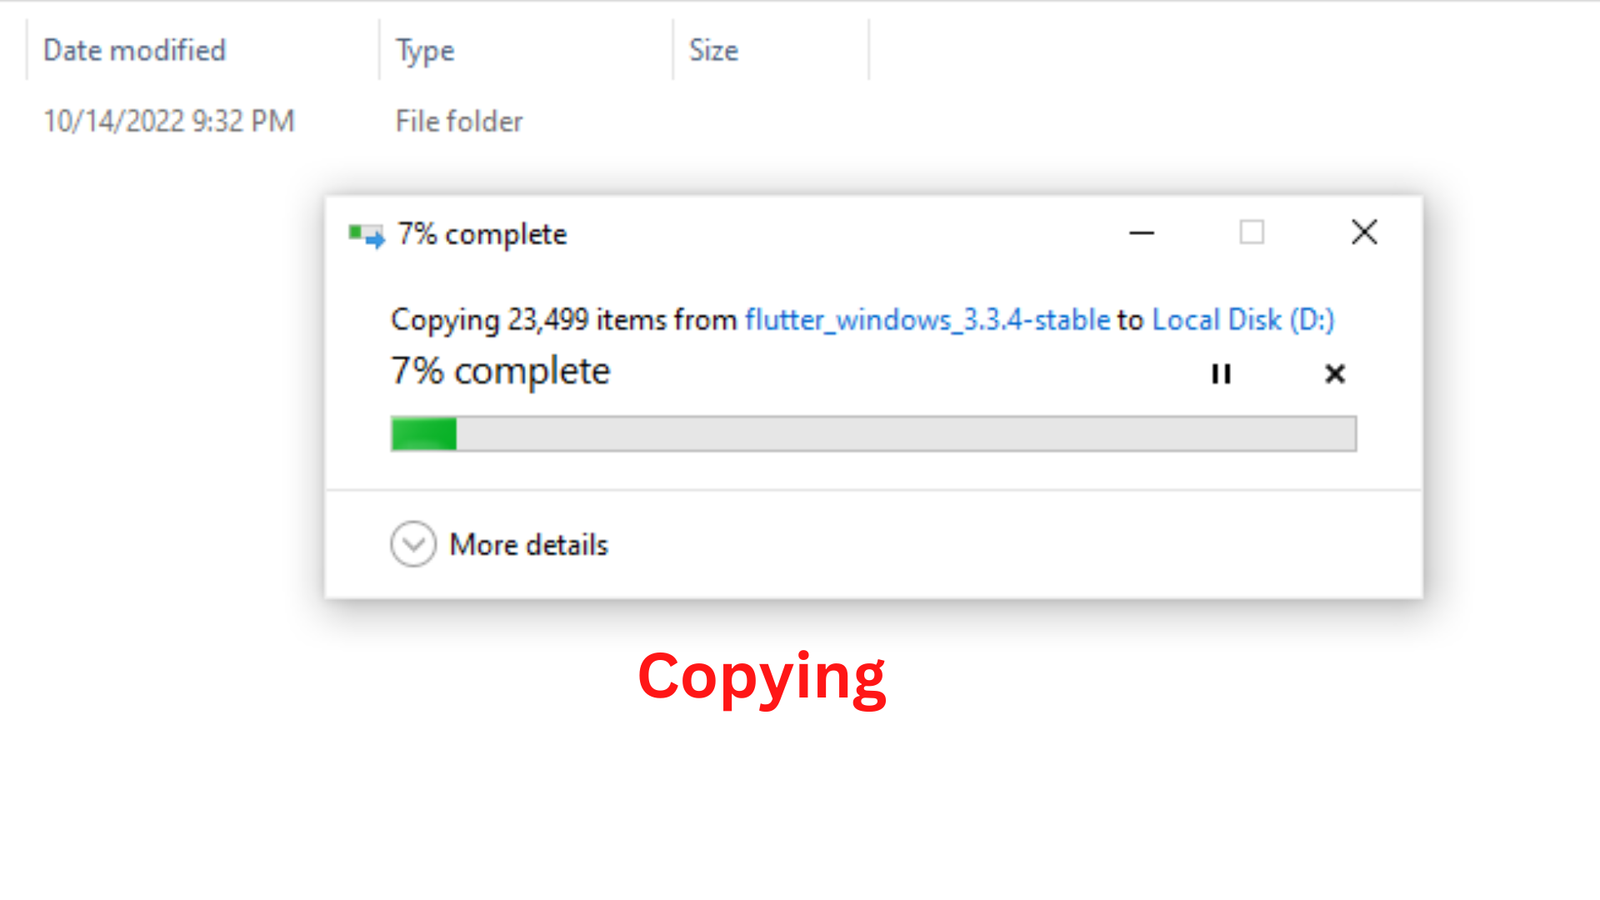
- I am copying the “Flutter folder” in Local Disk D.

Picture 14
Picture 15
STEP 2 ( Update Flutter Path )
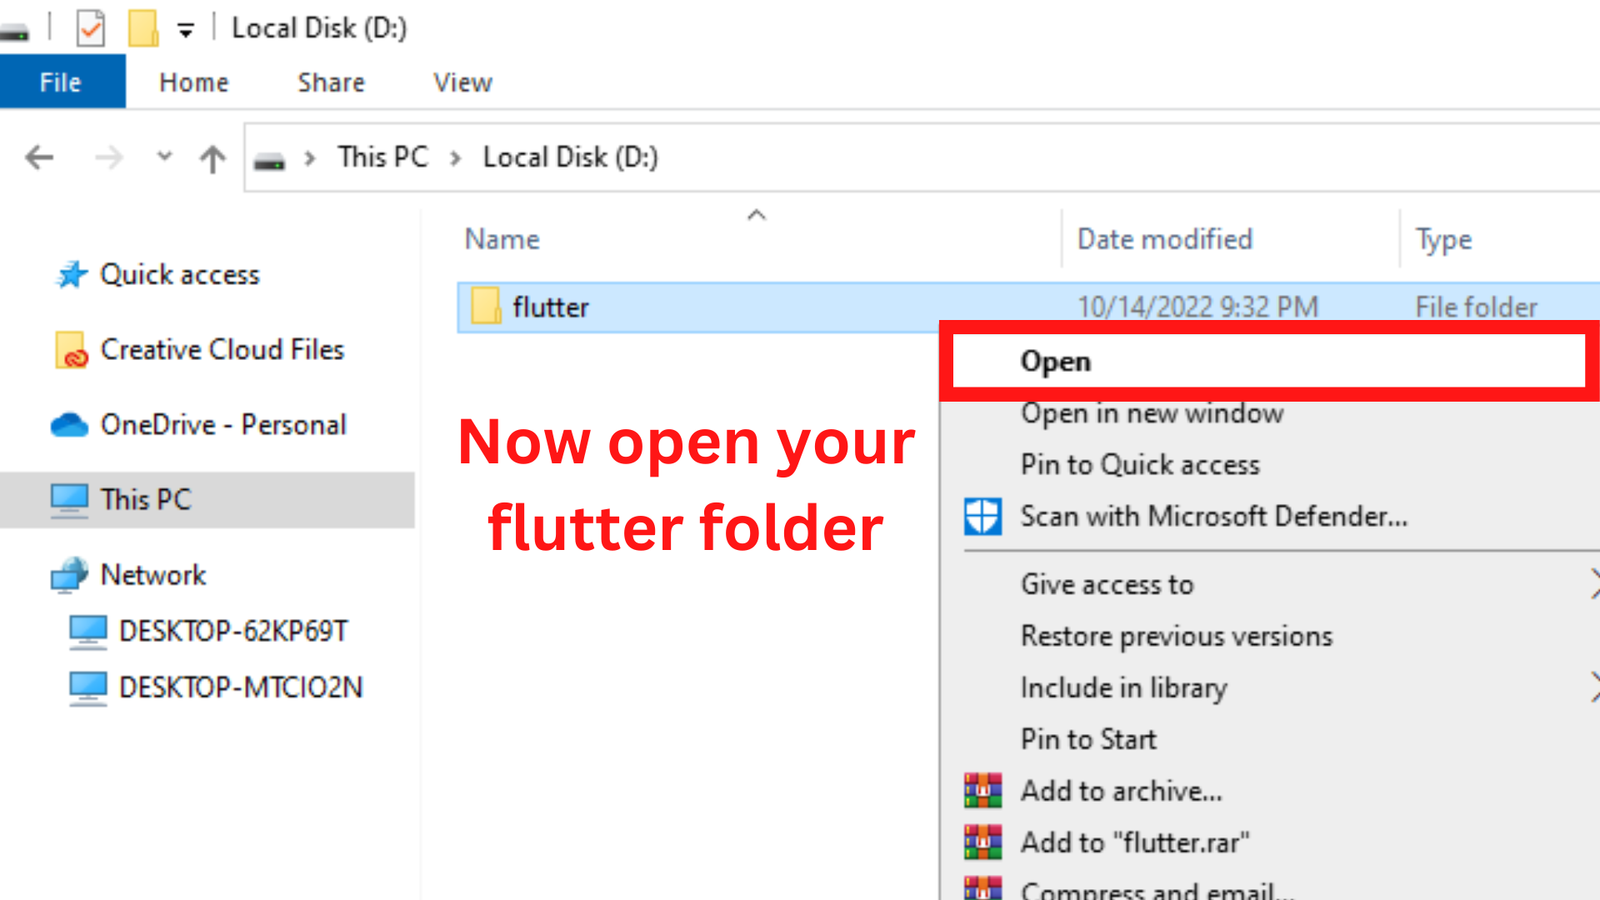
- After copying open the “flutter” folder than open the “bin” folder.
Picture 16

Picture 17
- Now, as you can see in picture, double click on the “Address bar” and copy the “address”.
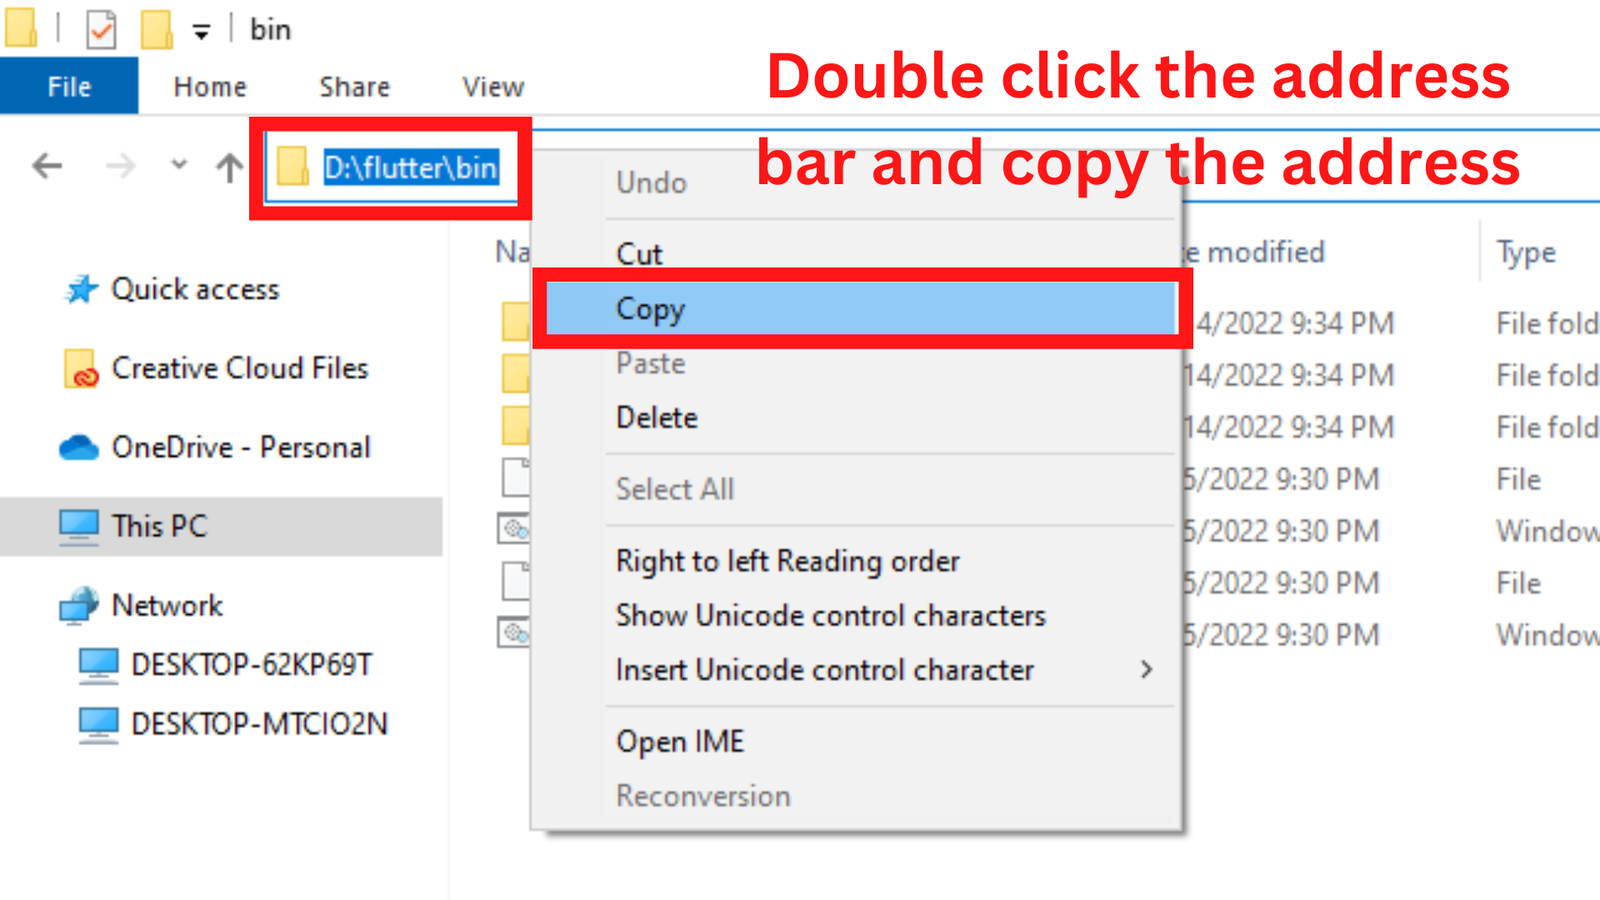
Picture 18
- Now, open the start menu and search for “Environment Variable” and press enter then click on the “Environments Variables” button.
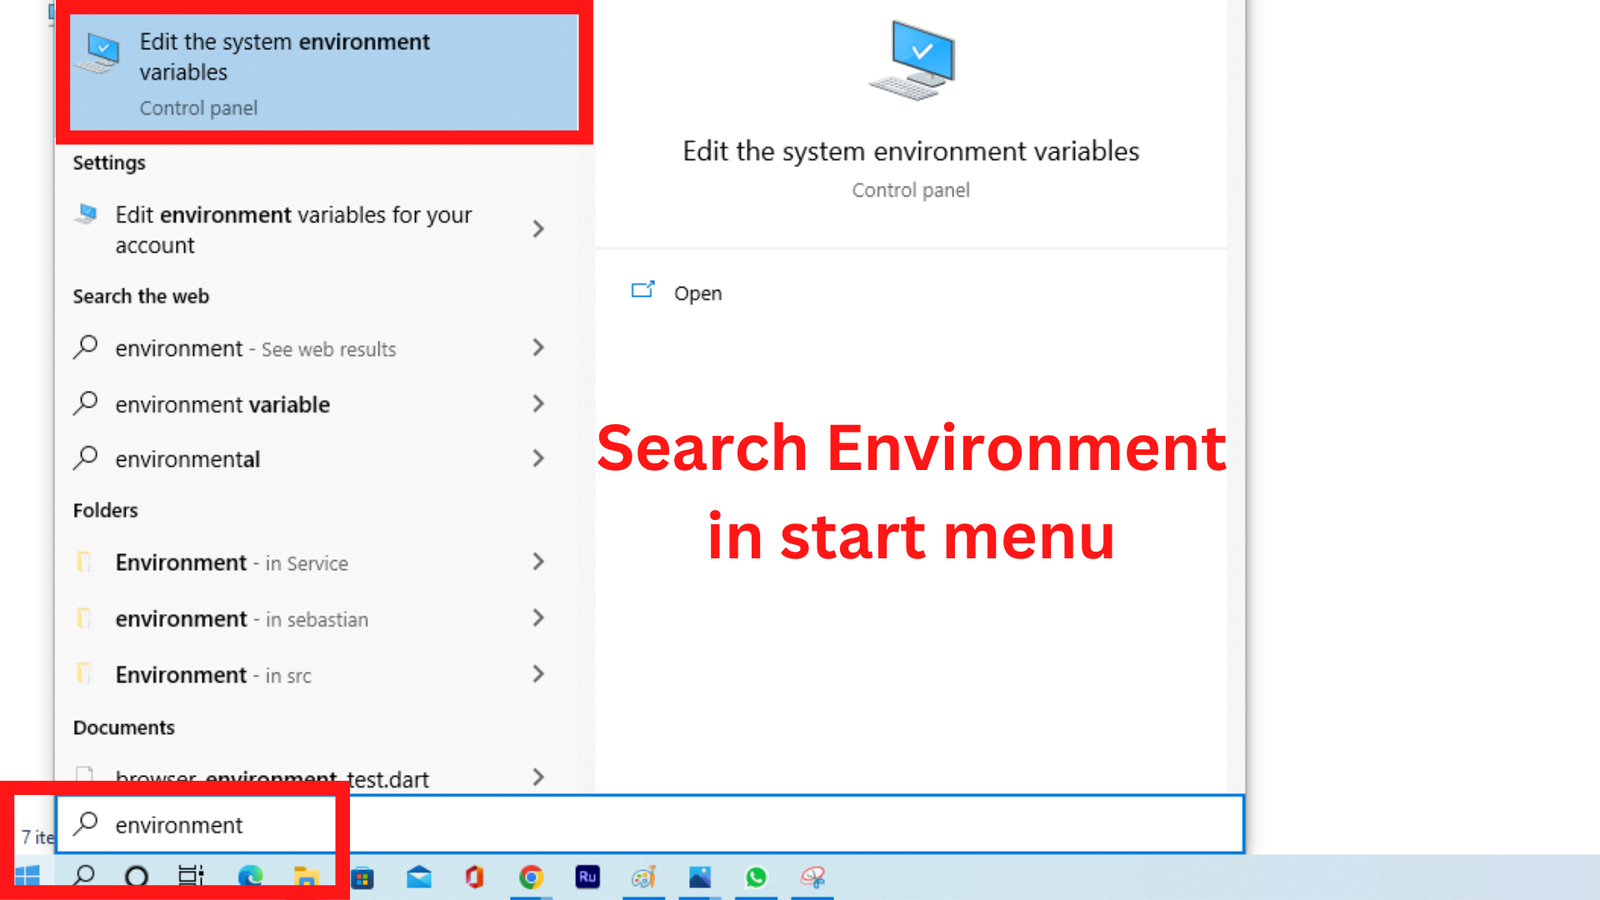
Picture 19
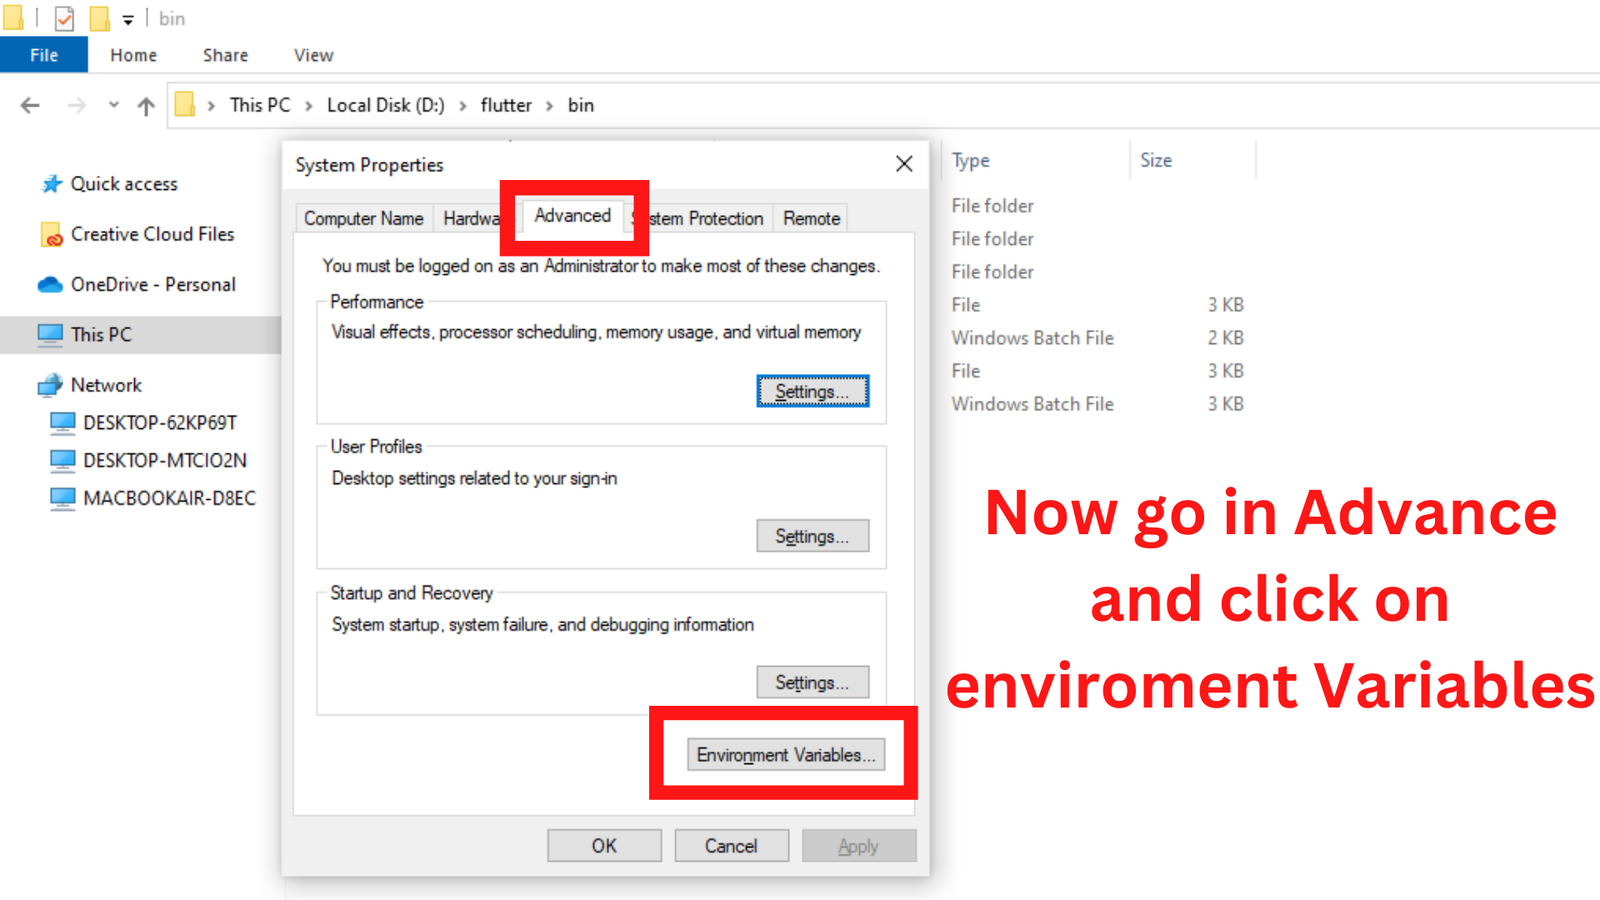
Picture 20
- Double-click on the “Path” option.

Picture 21
- Click on the “New” button and paste the “address” that you “copied in step 14”. Copy here in the highlighted area and press the “OK” button.

Picture 22
- Now again press “OK” button on 2 opened dialogs as seen in picture 23.
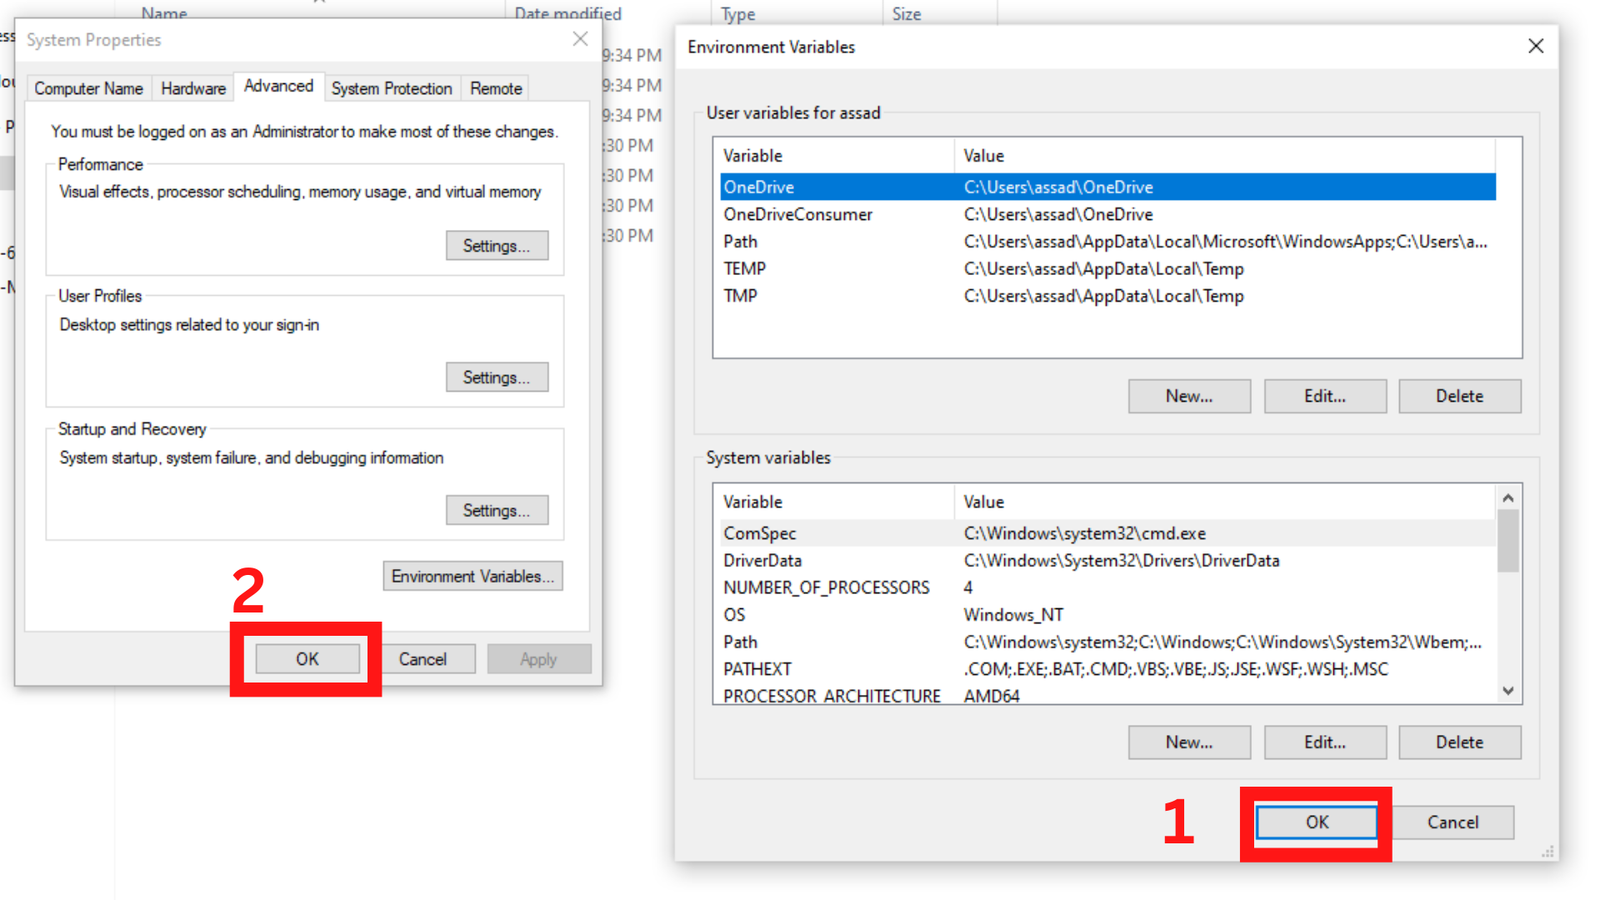
Picture 23
Now, we have successfully added path of “Flutter SDK” in windows
STEP 3 ( VS Code Setup )
If you haven’t installed VS Code please check this link
- Open the “Start menu” and search for “VS Code” and open it.
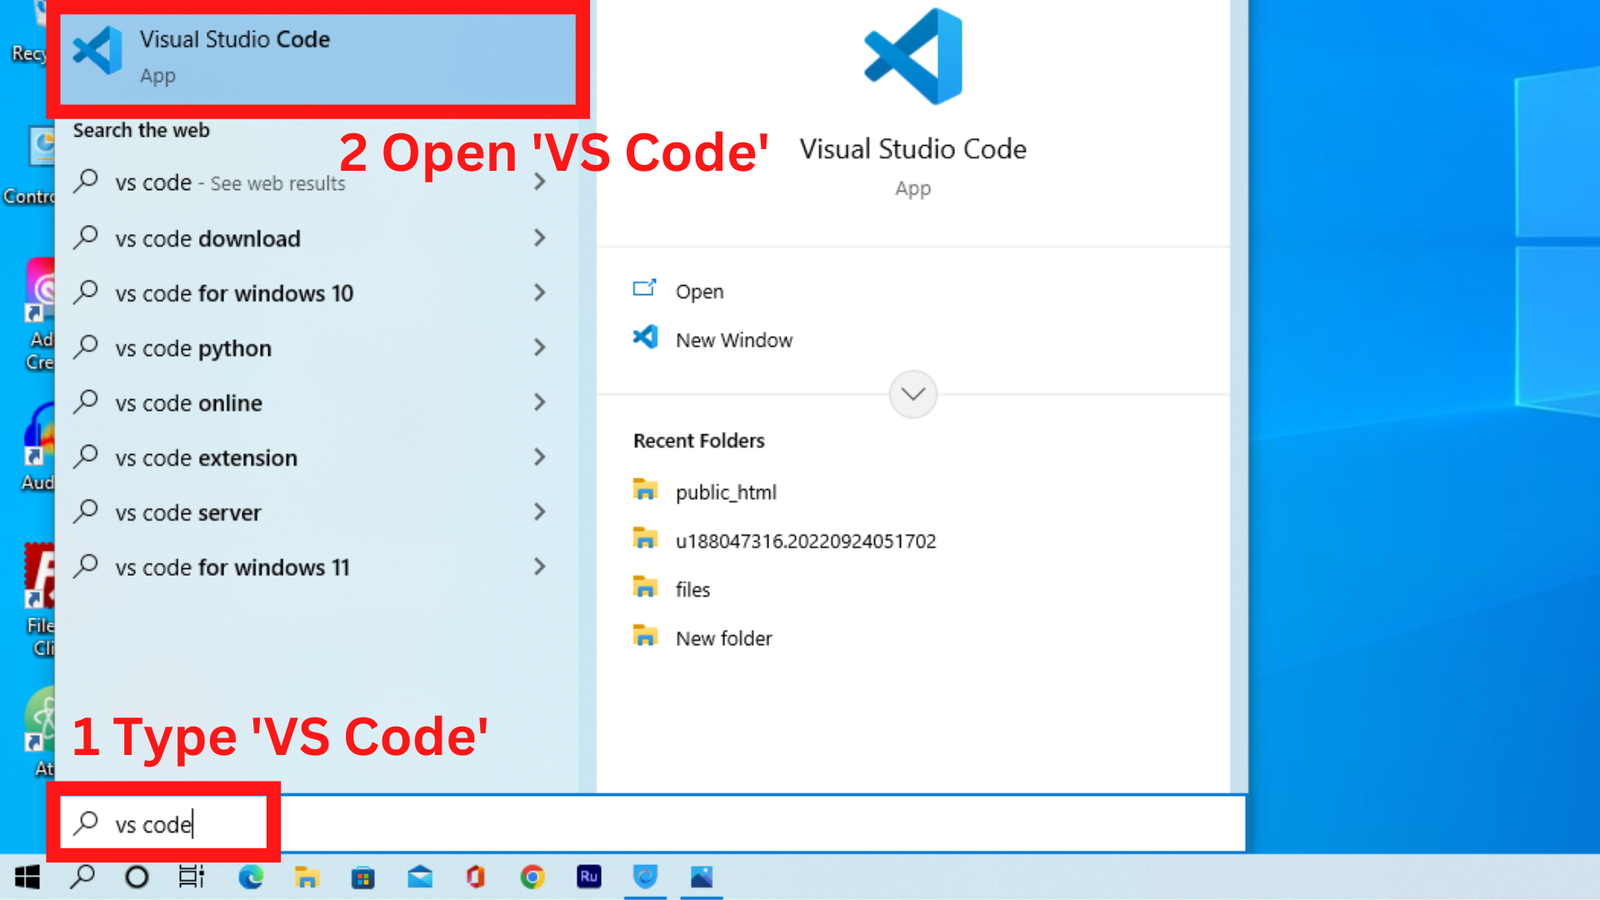
Picture 24
- Now click on the “Plugins Icon” at right side bar as shown in picture.
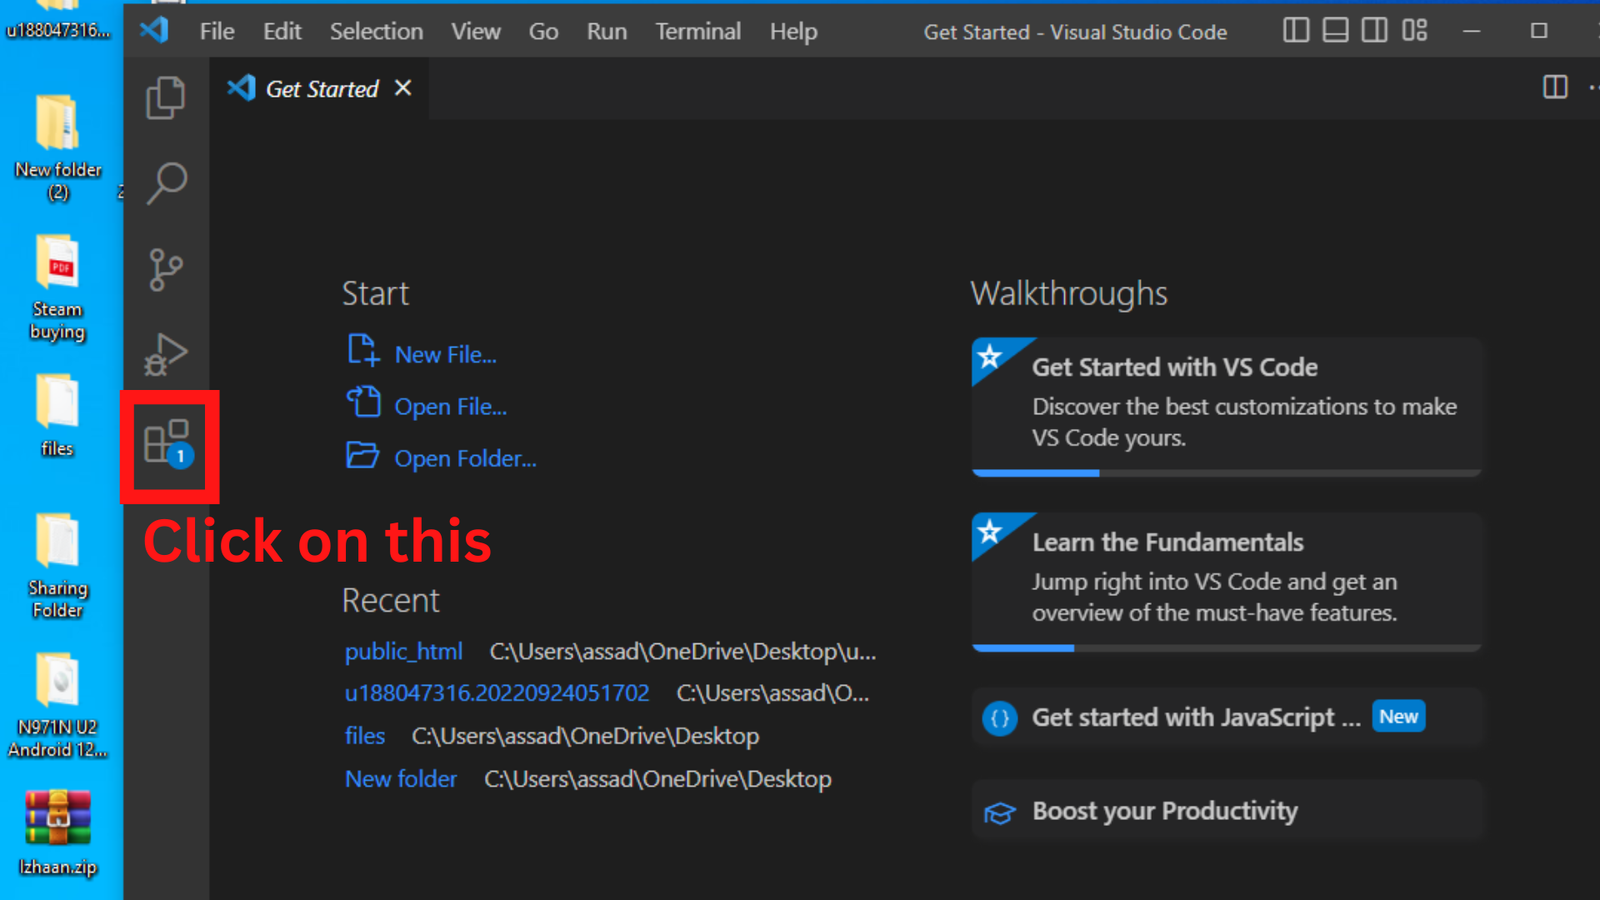
Picture 25
- Type “flutter” here and install the first one for adding flutter support in VS Code

Picture 26
- After installing the plugin close VS Code
STEP 4 ( Check If Flutter Installed Successfully )
- Now open the “Start menu” type “cmd” and hit “enter”
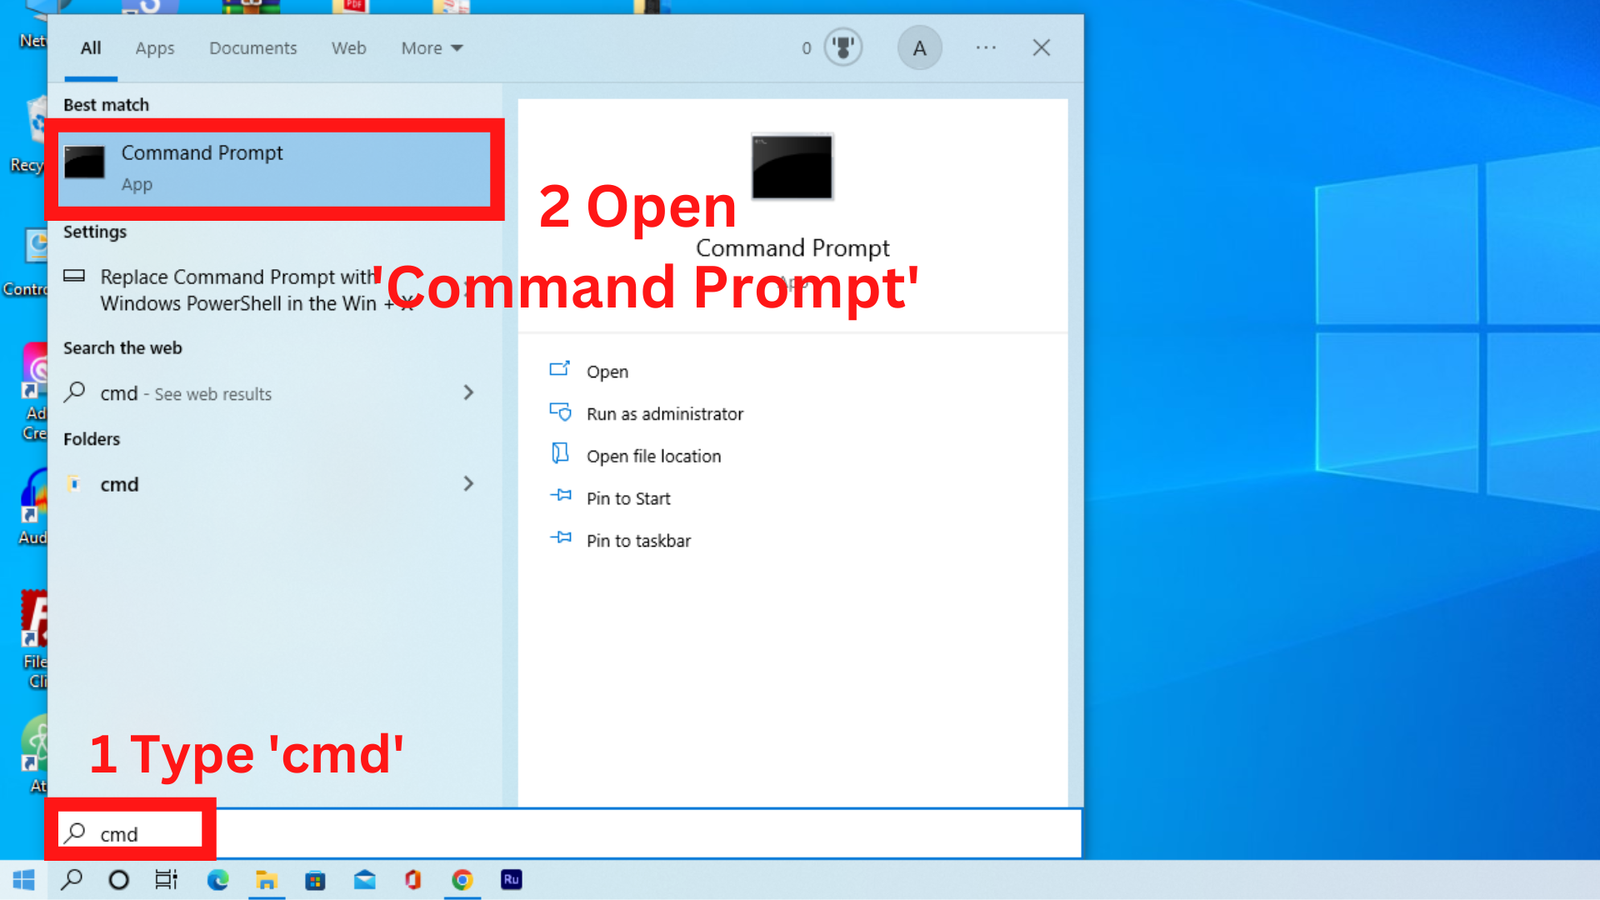
Picture 27
- Type “flutter doctor” in “cmd” and hit “enter”
- As you can see in the pictures here are some green checks [icon name=”circle-check” prefix=”fas”] on my cmd

Picture 28
If your “cmd” screen looks the same as the picture, it means you are good to go for starting Android development on Windows with Flutter.
Hurray! You’ve completed all the steps accordingly now let’s start Development.!
TOP 5 FLUTTER SDK RELATED QUESTIONS
- How to check system requirements on Windows?
- How to install Android Studio on Windows?
- How to install Visual Studio on Windows?
- How to Setup a development environment for Windows?
- How to install flutter sdk on Mac OS?
Sharing is Caring, don’t forget to share POST with your friends


[…] How to setup flutter sdk on windows? […]