
Android Studio is the official IDE for Android. It is designed specifically for Android to speed up development and assist you in creating the best apps possible for all Android devices.
if you want to know more about Andorid Studio click here.
System Requirements
To install and run Android Studio smoothly on windows, your developement environment must meet these minimum requirements.
Before installing, here are the minimum system requirements:
- Operating systems : Windows 10 or later (64-bit), x86_64 CPU architecture; 2nd generation Intel Core or newer, or AMD CPU with support for a Windows Hypervisor.
- Ram : 4 GB RAM or more.
- Disk Space : 8 GB of available disk space.
- Screen Resolution : 1280 x 800 minimum screen resolution. (optional)
Here is the link for checking system requirements on windows
Downloading Android Studio
After verifying the system requirements lets jump into downloading
Let’s start the procedure
DOWNLOADING ( STEP 1 )
- Open your favorite browser and download android studio installer from the link given below.
- To download Android Studio for windows click on this link.
- On this page you will get a green button to “Download Android Studio” installer file.

Picture 1
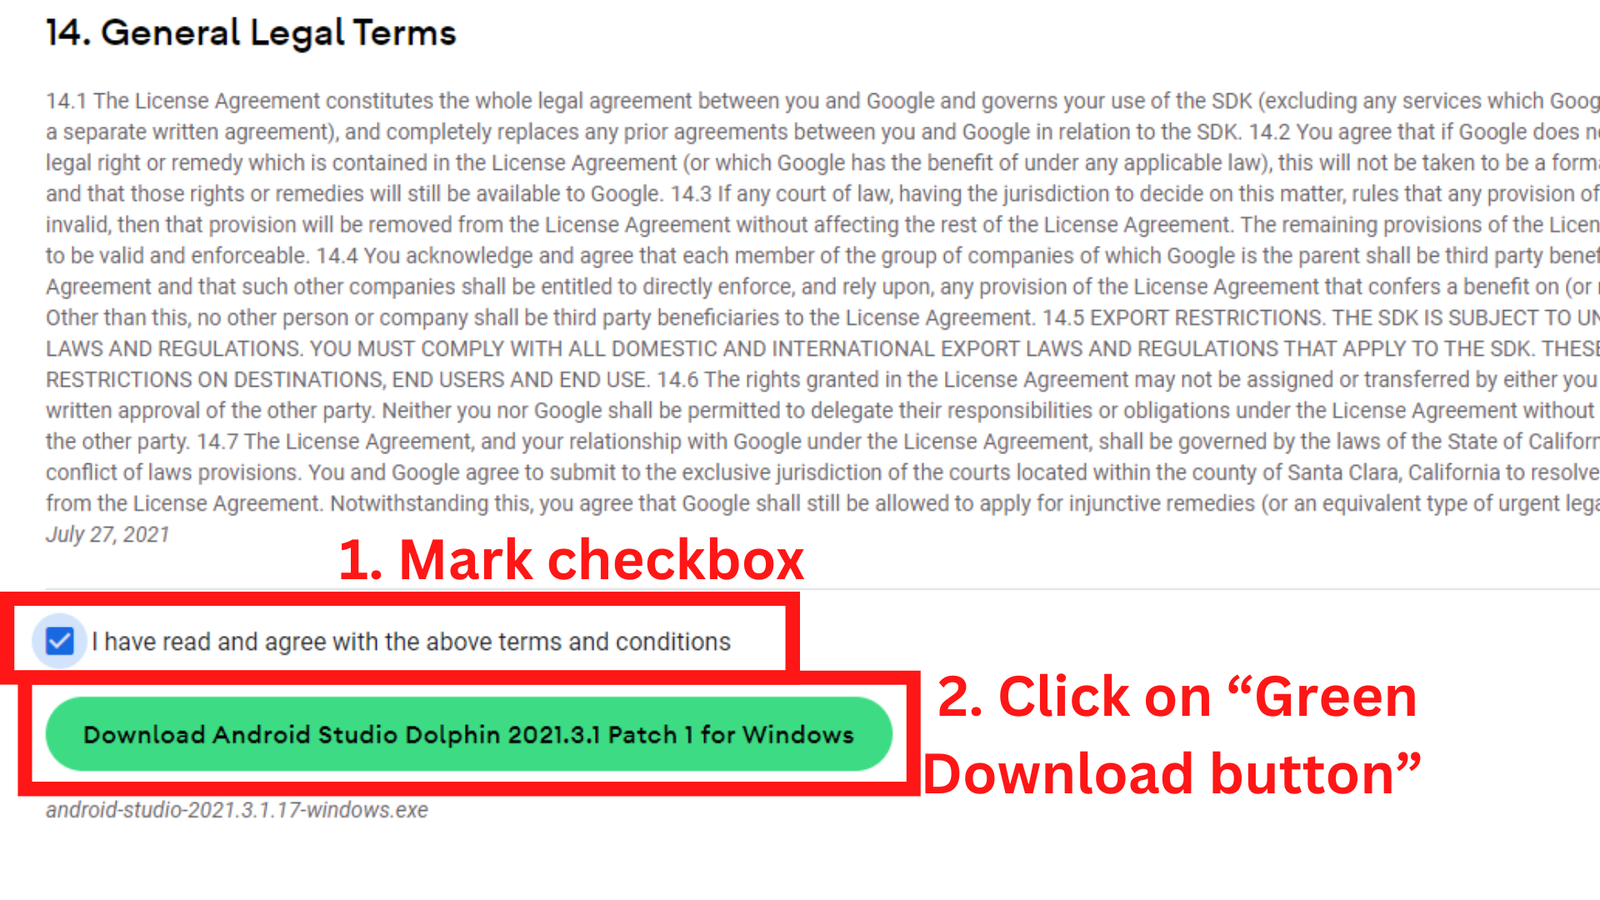
- After clicking on the green button, you will see the “Terms and Conditions dialog box” scroll down to the bottom and mark check the checkbox and click on “Green Download button” as can be seen in picture 3.

Picture 2
Picture 3
- After clicking on downloading button
• if your download starts automatically at bottom than you can skip to step 6 and picture 6.
• Otherwise if a dialog box comes like in picture 4 you have to select the location, where you want to download Android Studio installer file.
• I am selecting my downloads folder as can be seen in picture 5. After selecting the downloading folder you can simply click on “Save” button to start downloading.
Picture 4

Picture 5
- Now, Android studio is downloading.

Picture 6
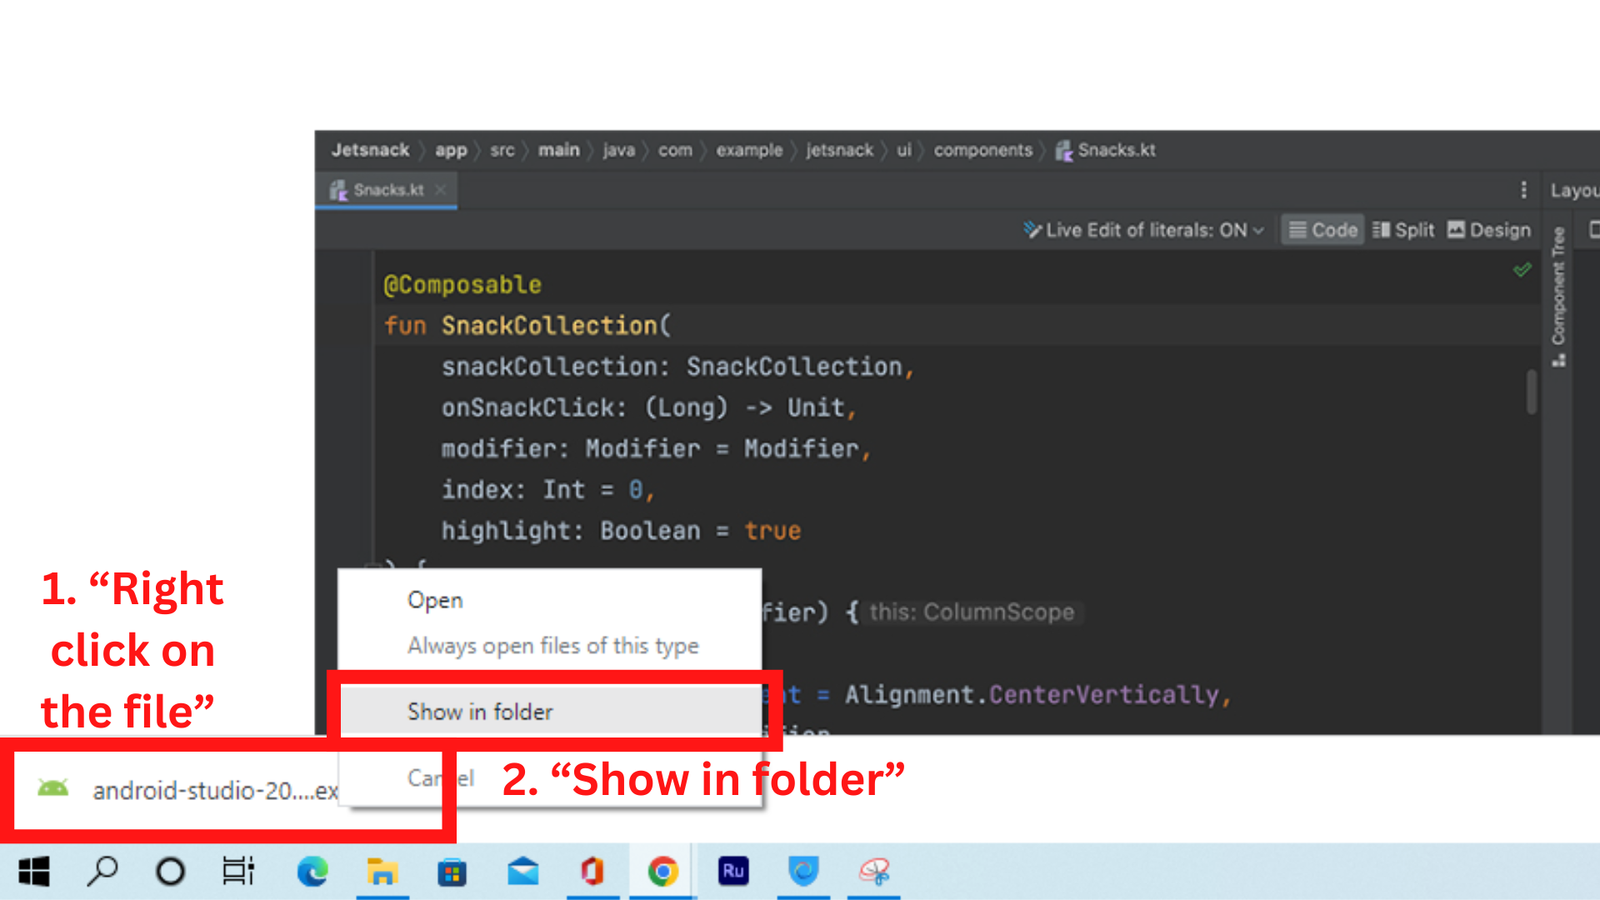
- After download completes “Right click on the file” and click on “Show in folder” As can be seen in picture 7.
Picture 7
INSTALLATION ( STEP 2 )
- Here is the Android Studio installer. Now, double click on it to start the installation and wait some seconds until Android Studio starts the installer. It may take some time according to the speed of your computer/laptop.

Picture 8
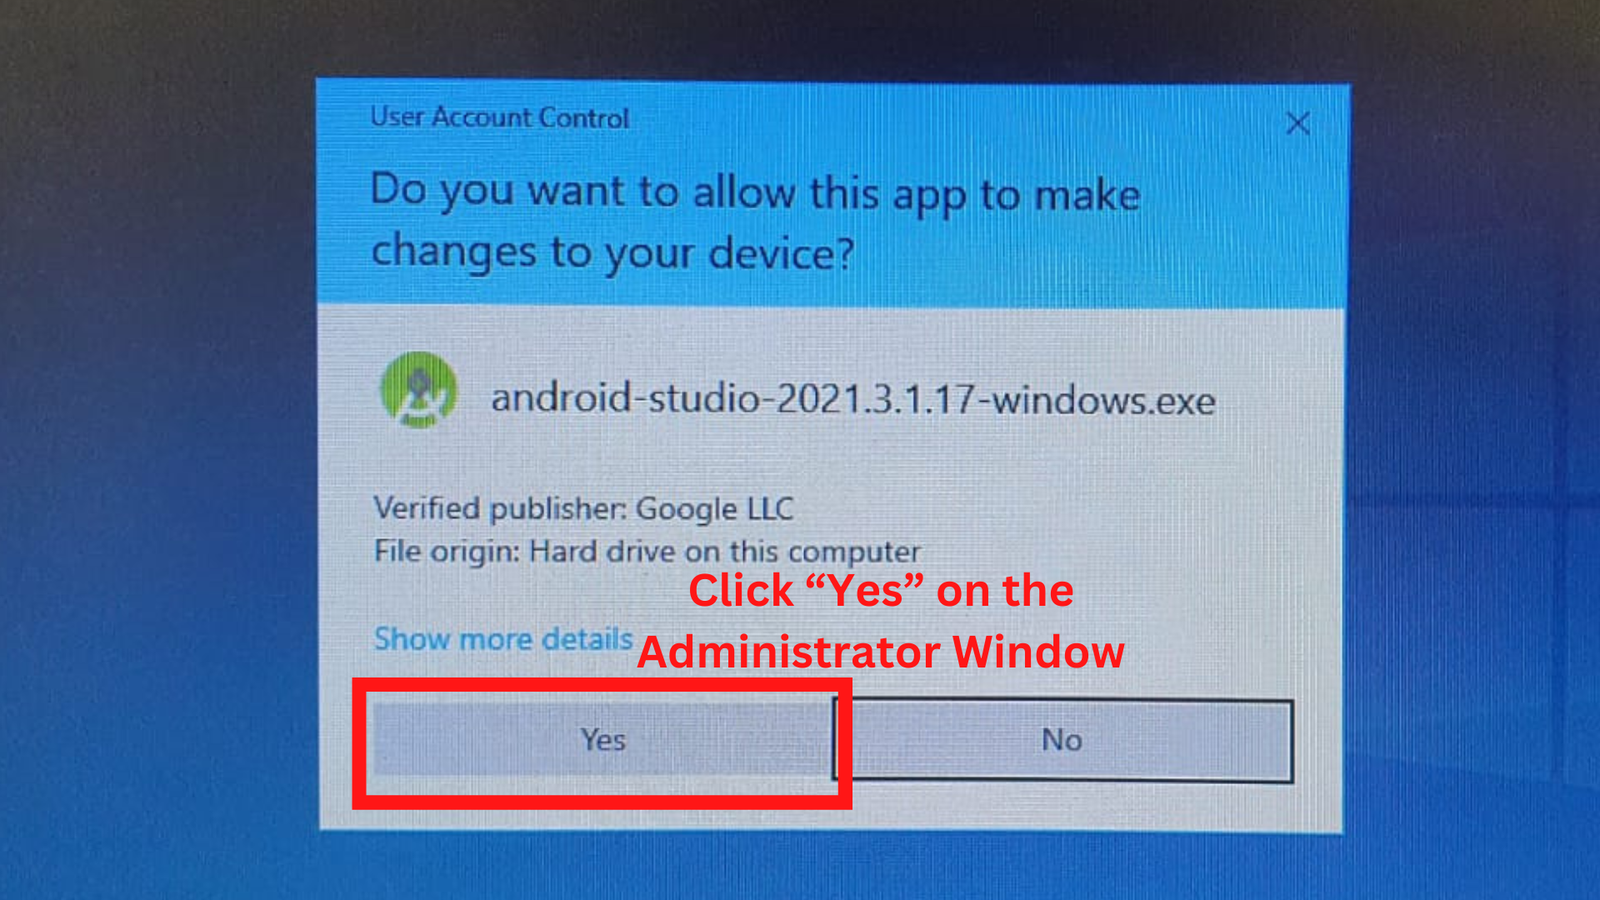
- Click “Yes” on the Administrator Window.
Picture 9
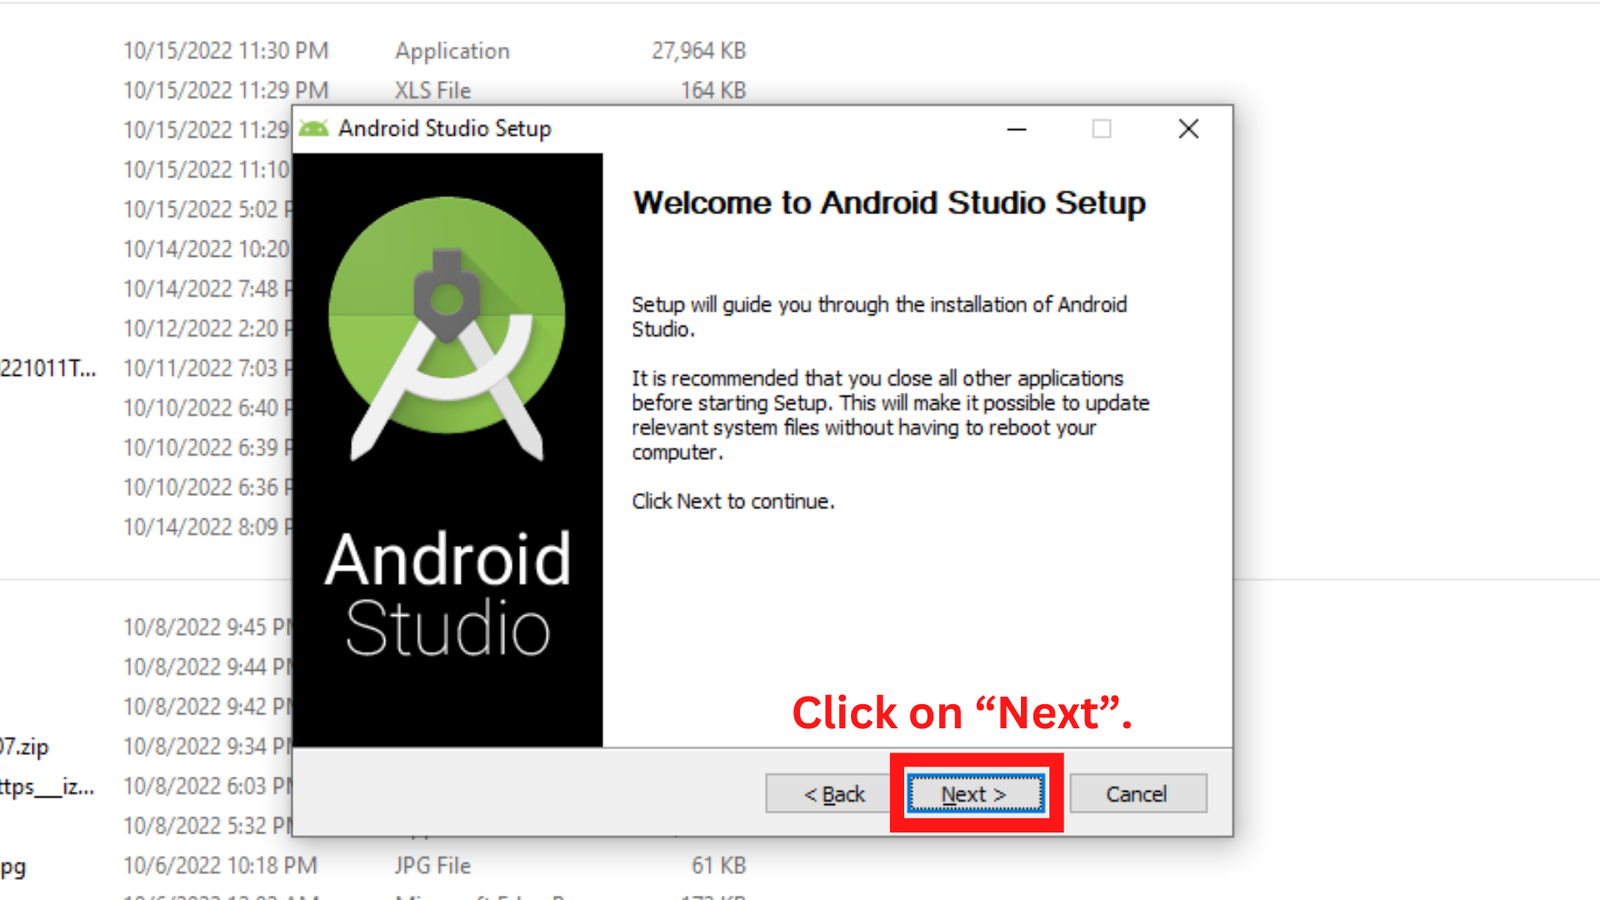
- After clicking on “Yes” button Android Studio installer dialog box will open as can be seen in picture 10.
- Now click on “Next”.
Picture 10
- Again, click on “Next”.

Picture 11
- Now, you have to select the location where you want to download the “Android Studio”. I am installing Android Studio in my “C drive”. This is the default installation directory for installing Android Studio. Now, click on “Next”
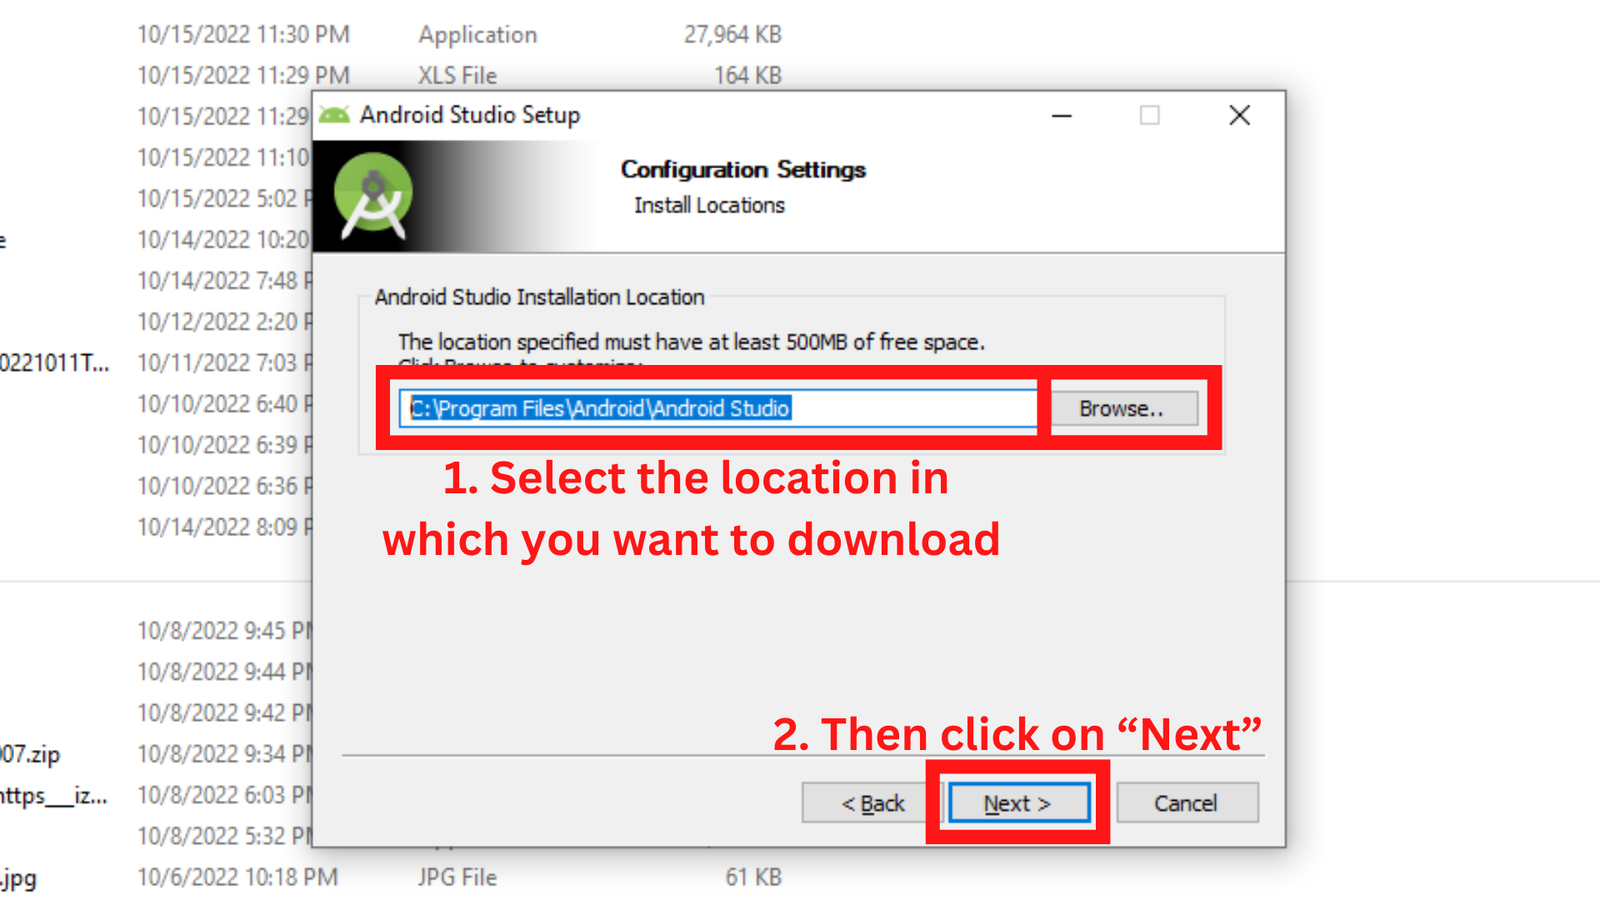
Picture 12
- Click on “Install”.
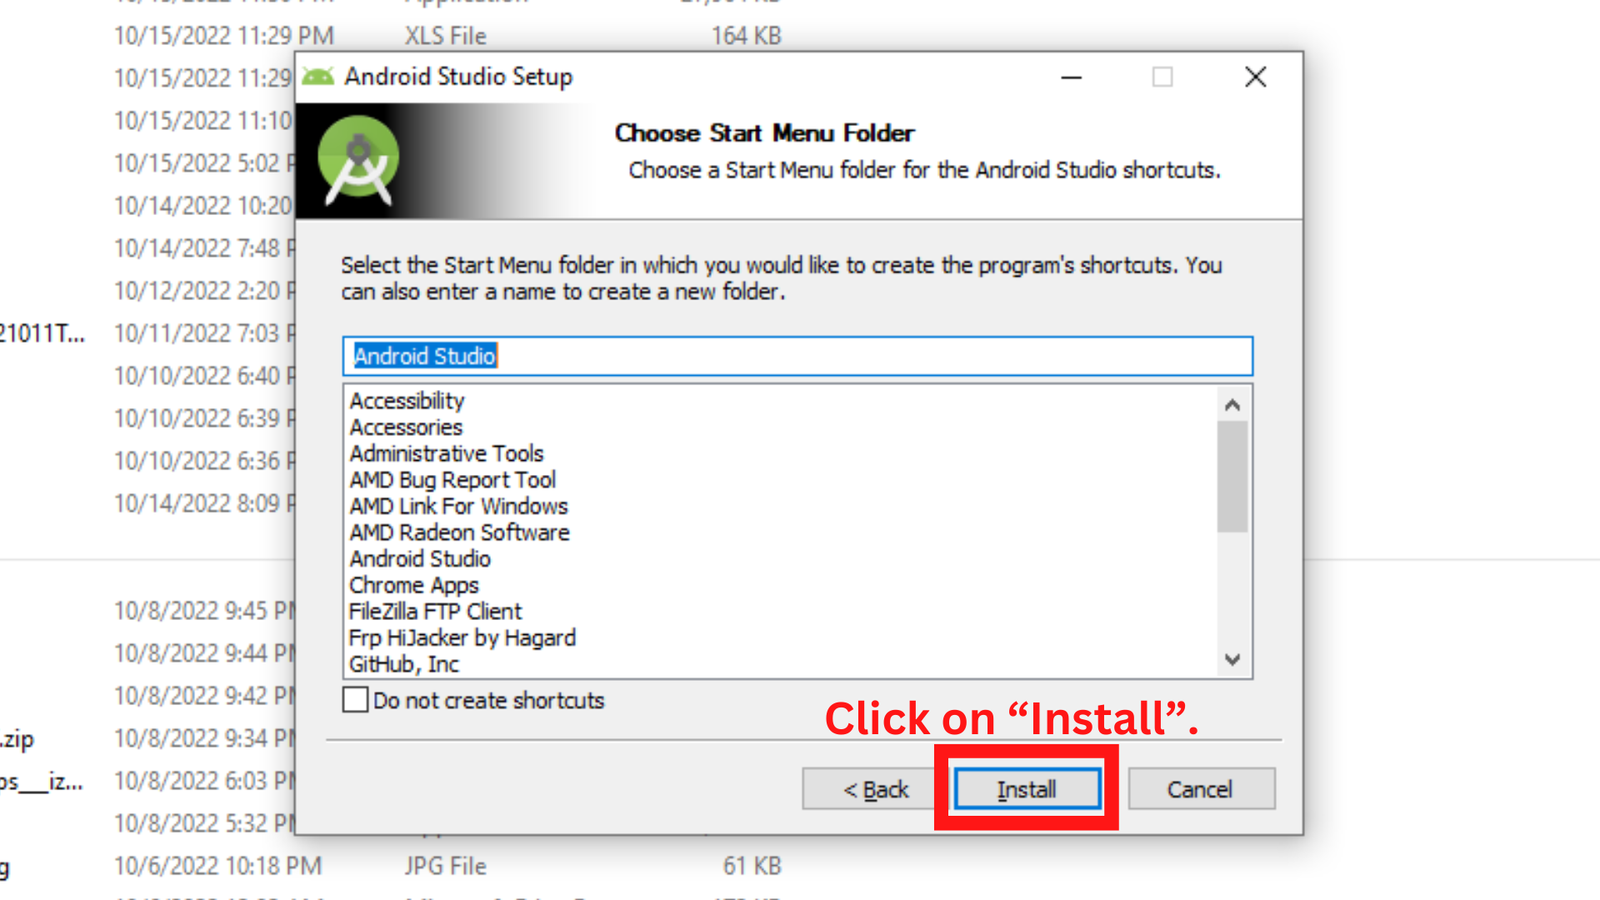
Picture 13
- Now, you can see it is installing.
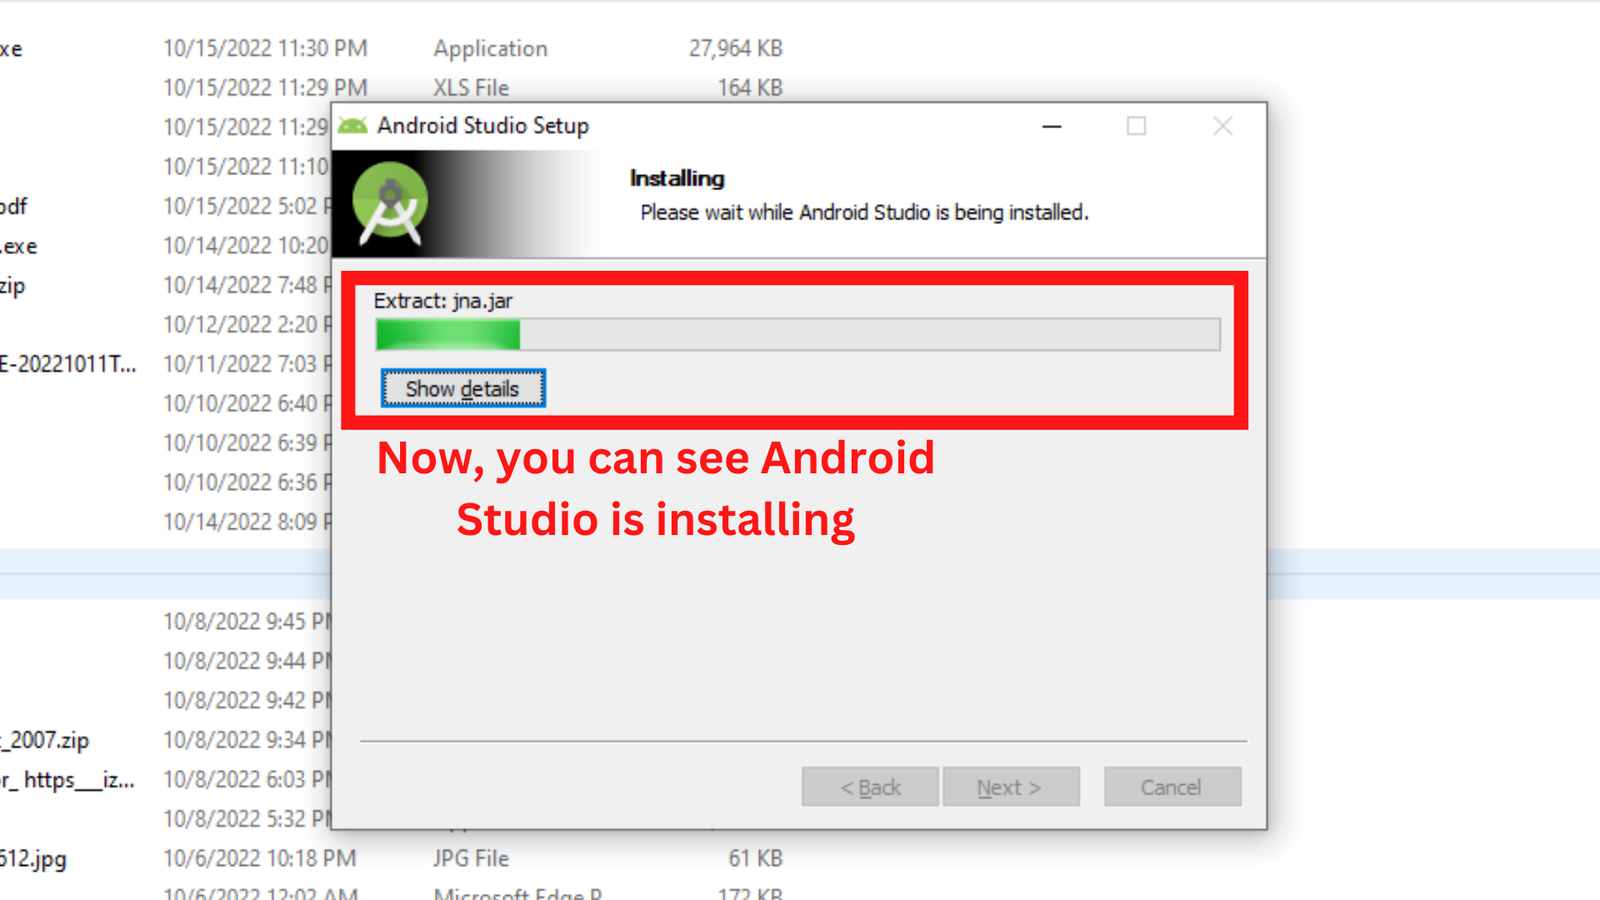
Picture 14
- Android Studio is now installed and click on “Next”.
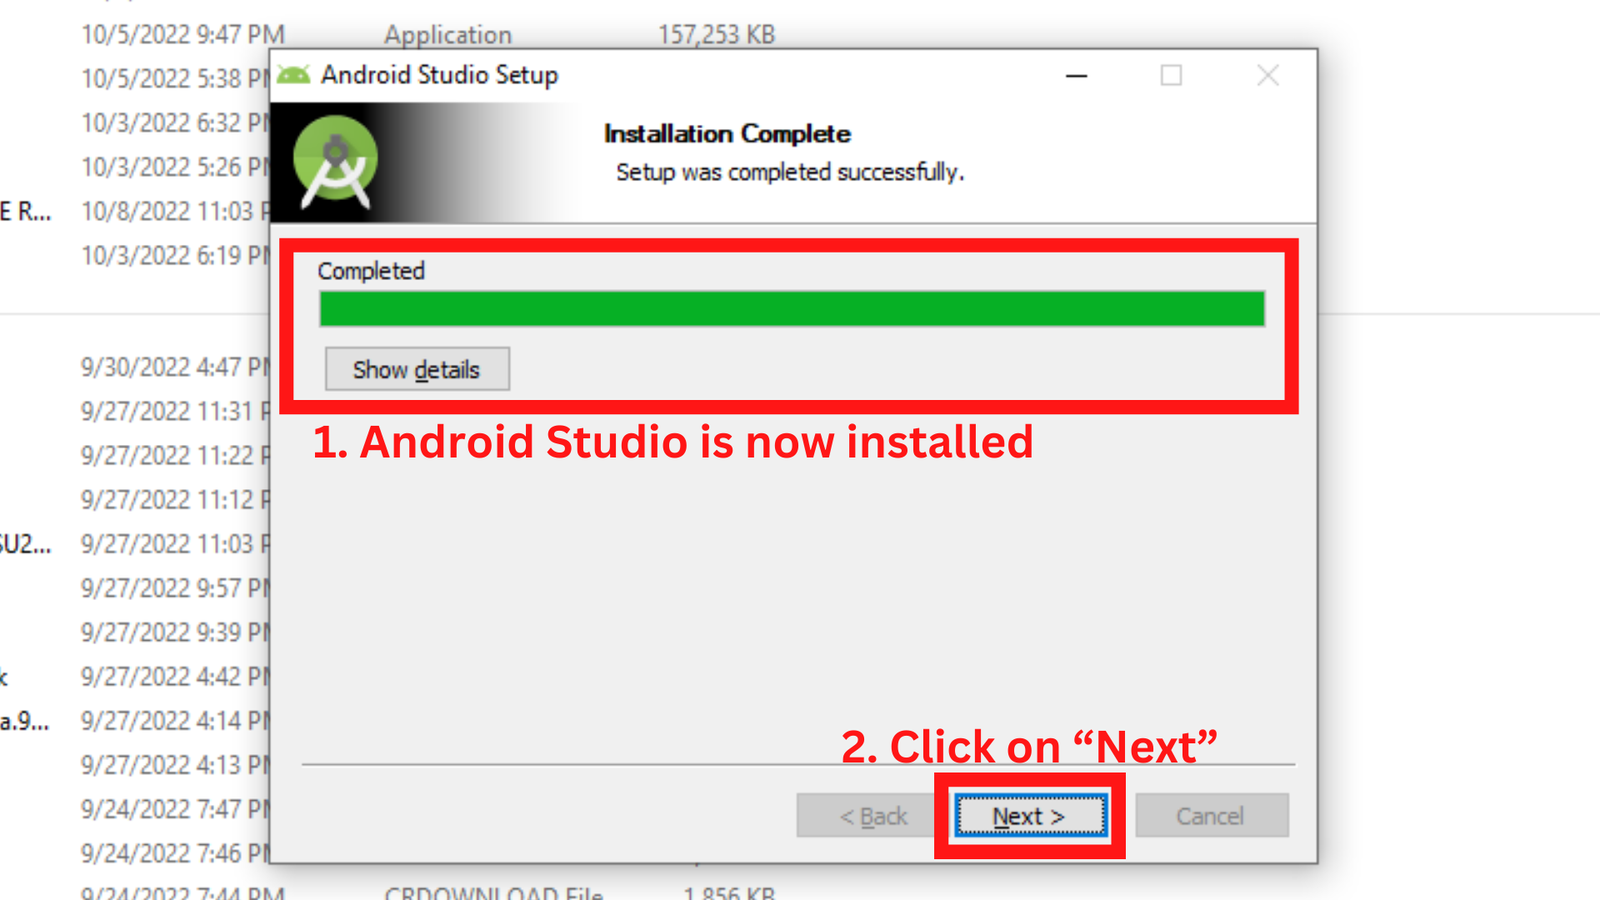
Picture 15
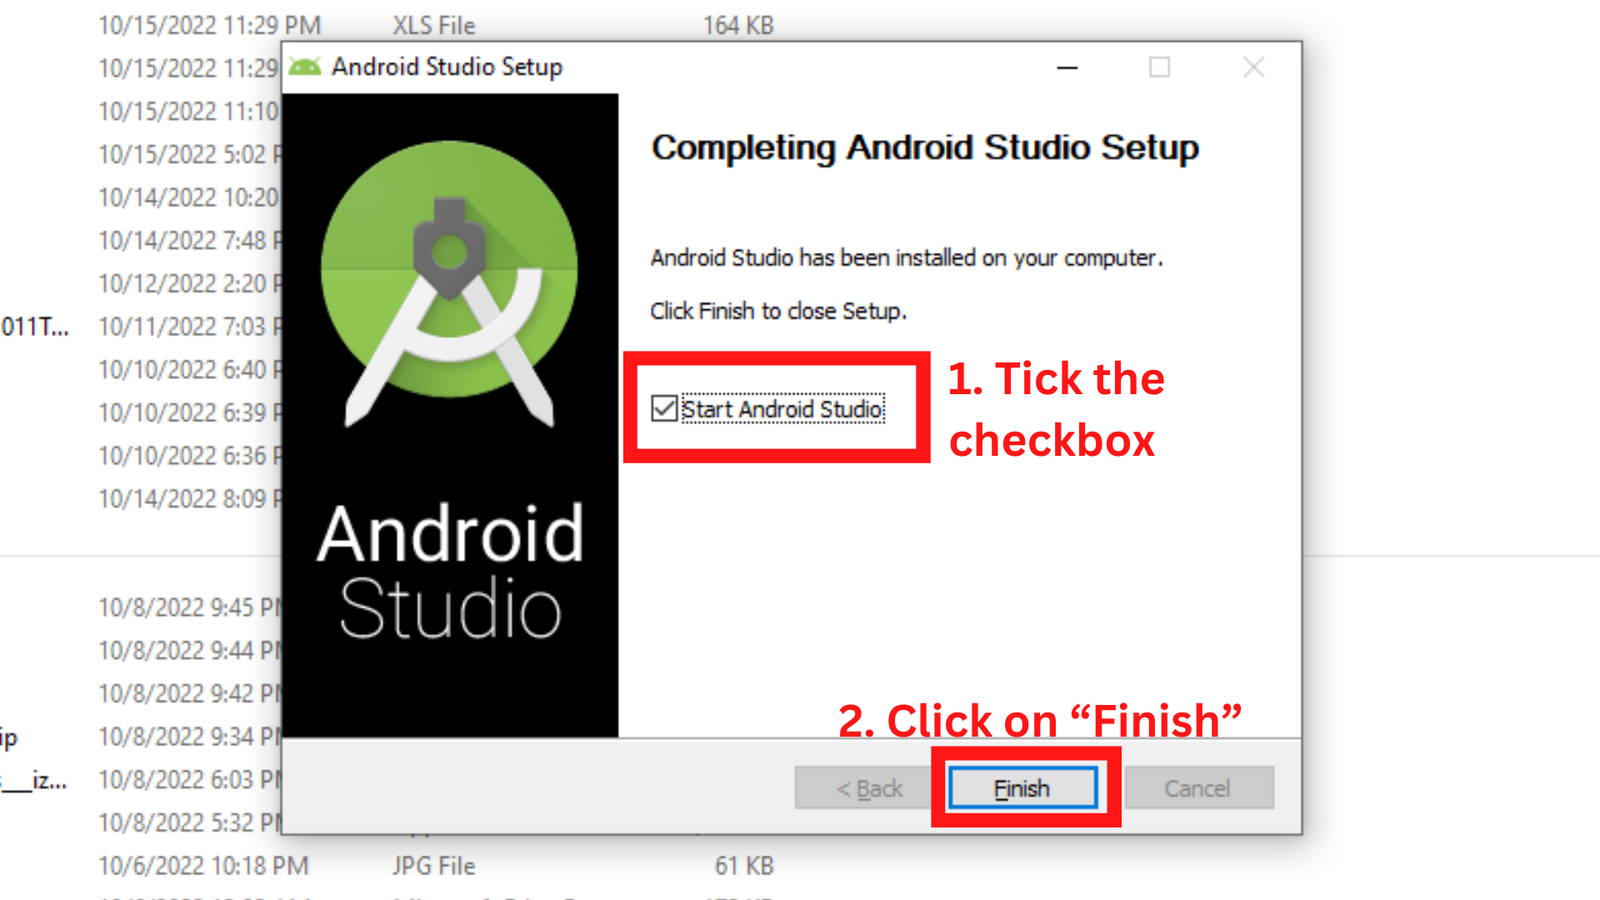
- Now tick the checkbox and click on “Finish”.
Picture16
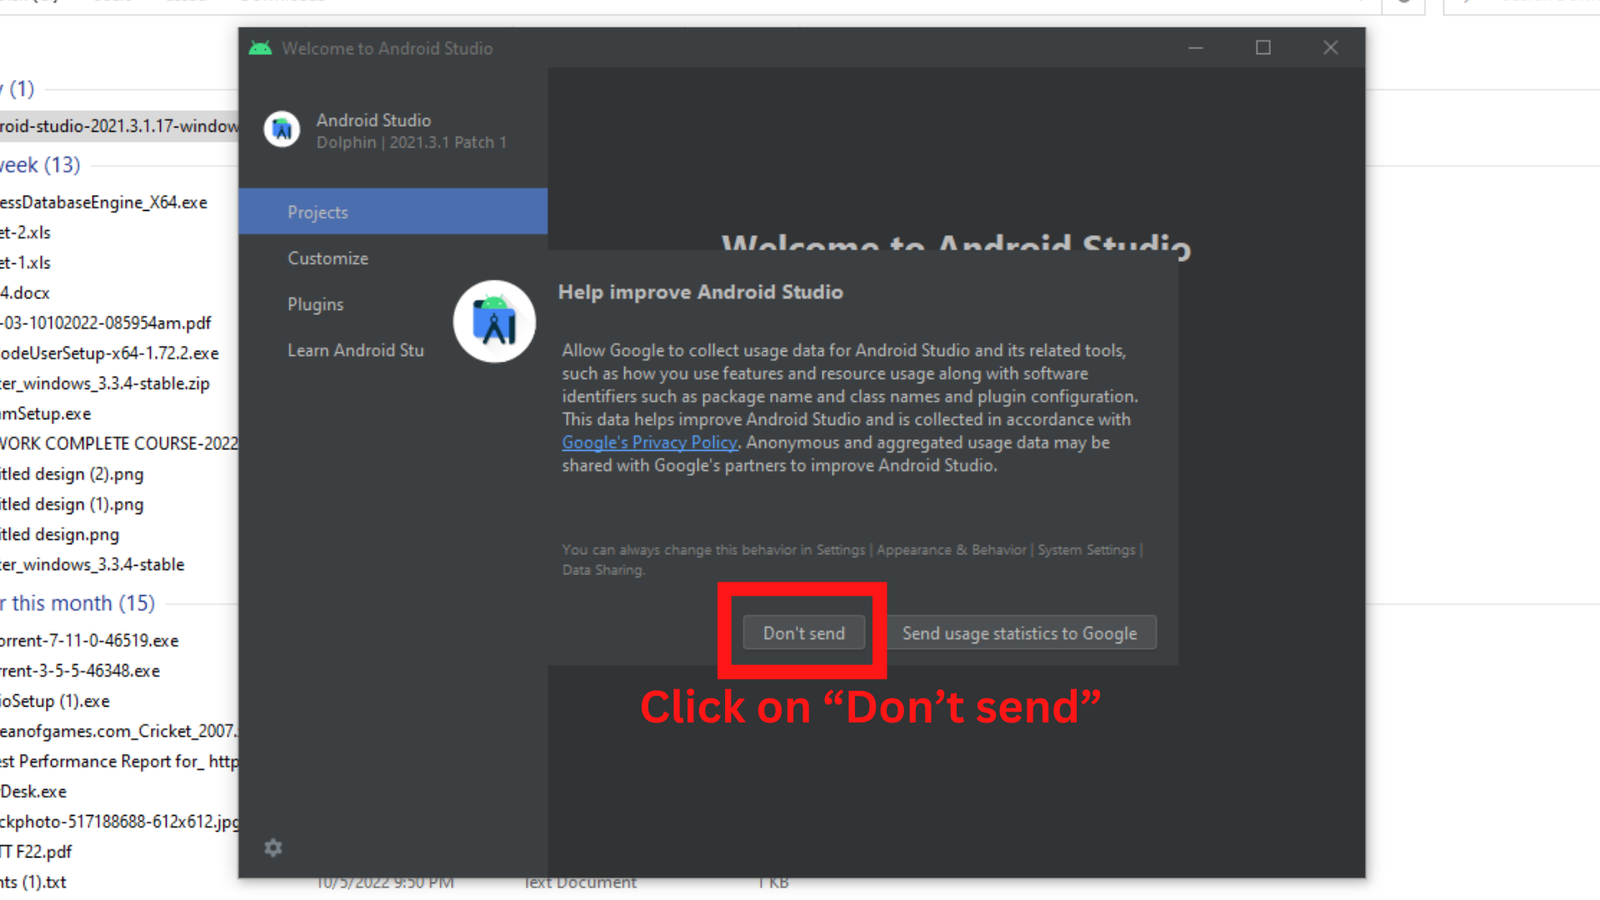
- Click on “Don’t send” if the window pops up like shown in picture 17.
Picture 17
ANDROID SDK SETUP ( STEP 3)
- Here, you can see the Welcome Screen. Now, hover on More Actions and select the option “SDK Manager”.

Picture 18
- Click on “Android SDK” form left sidebar and than click on “SDK Tools” at top bar like shown in picture 19.

Picture 19
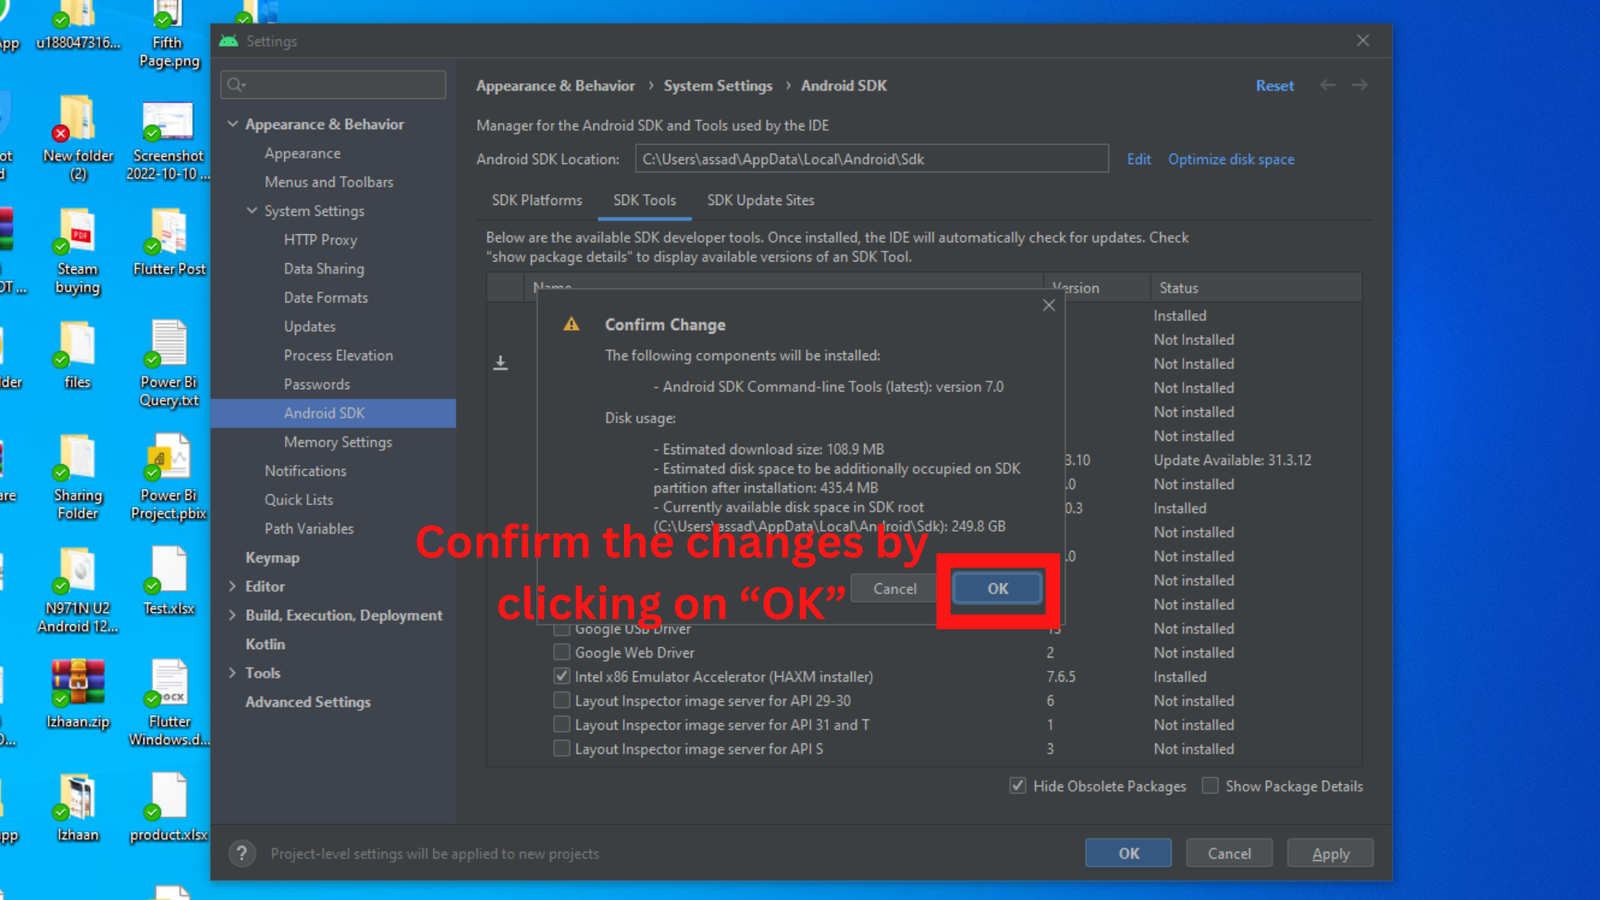
- Now check the check box of Android SDK Command-line Tools and click on “Apply”.

Picture 20
- Confirm the changes by clicking on “OK”.

Picture 21
Picture 22
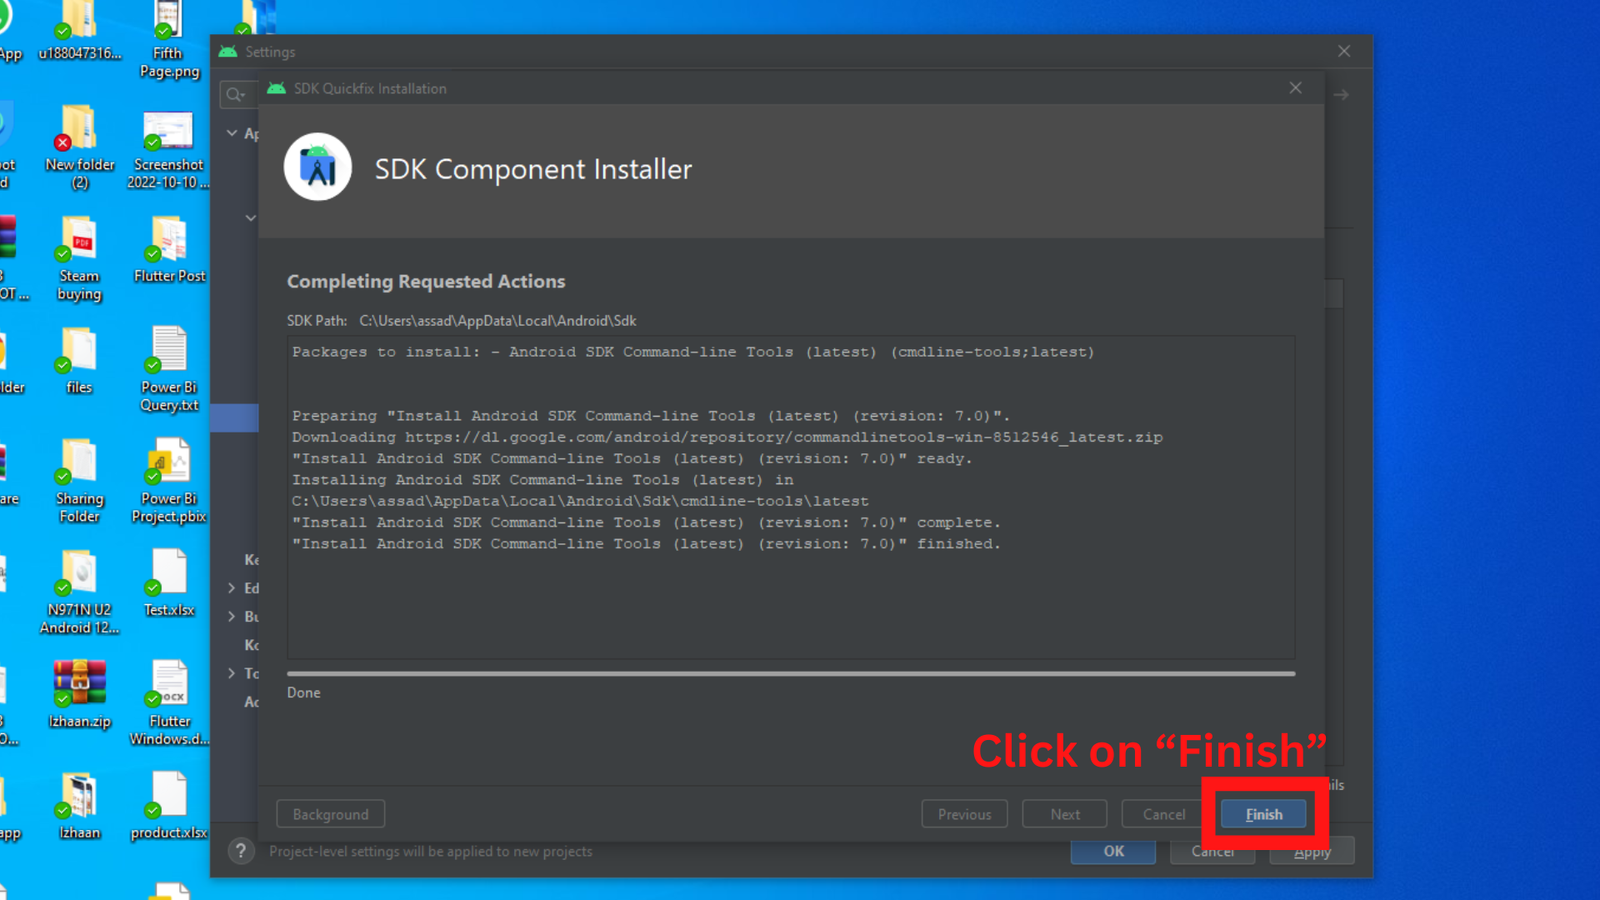
- Now the Command Line tools are downloading, click on “Finish” after downloads completes.

Picture 23
Picture 24
- Now, click on “SDK Platforms”
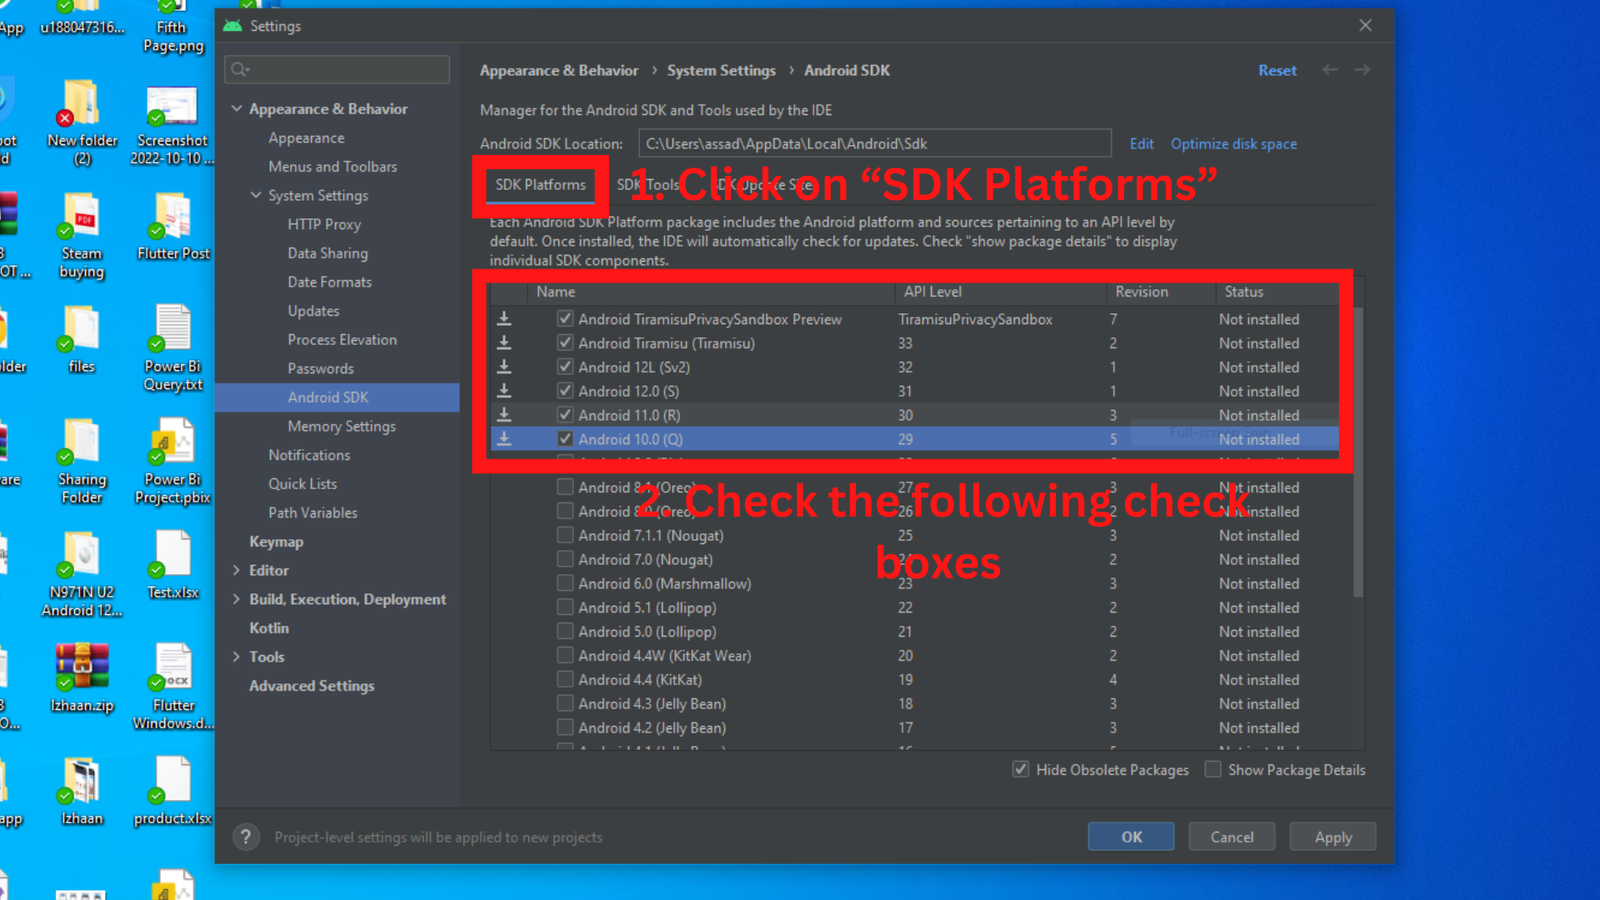
Picture 25
- And check the following check boxes as seen in picture 25 and click on apply.
- Confirm the changes by clicking on “OK”.
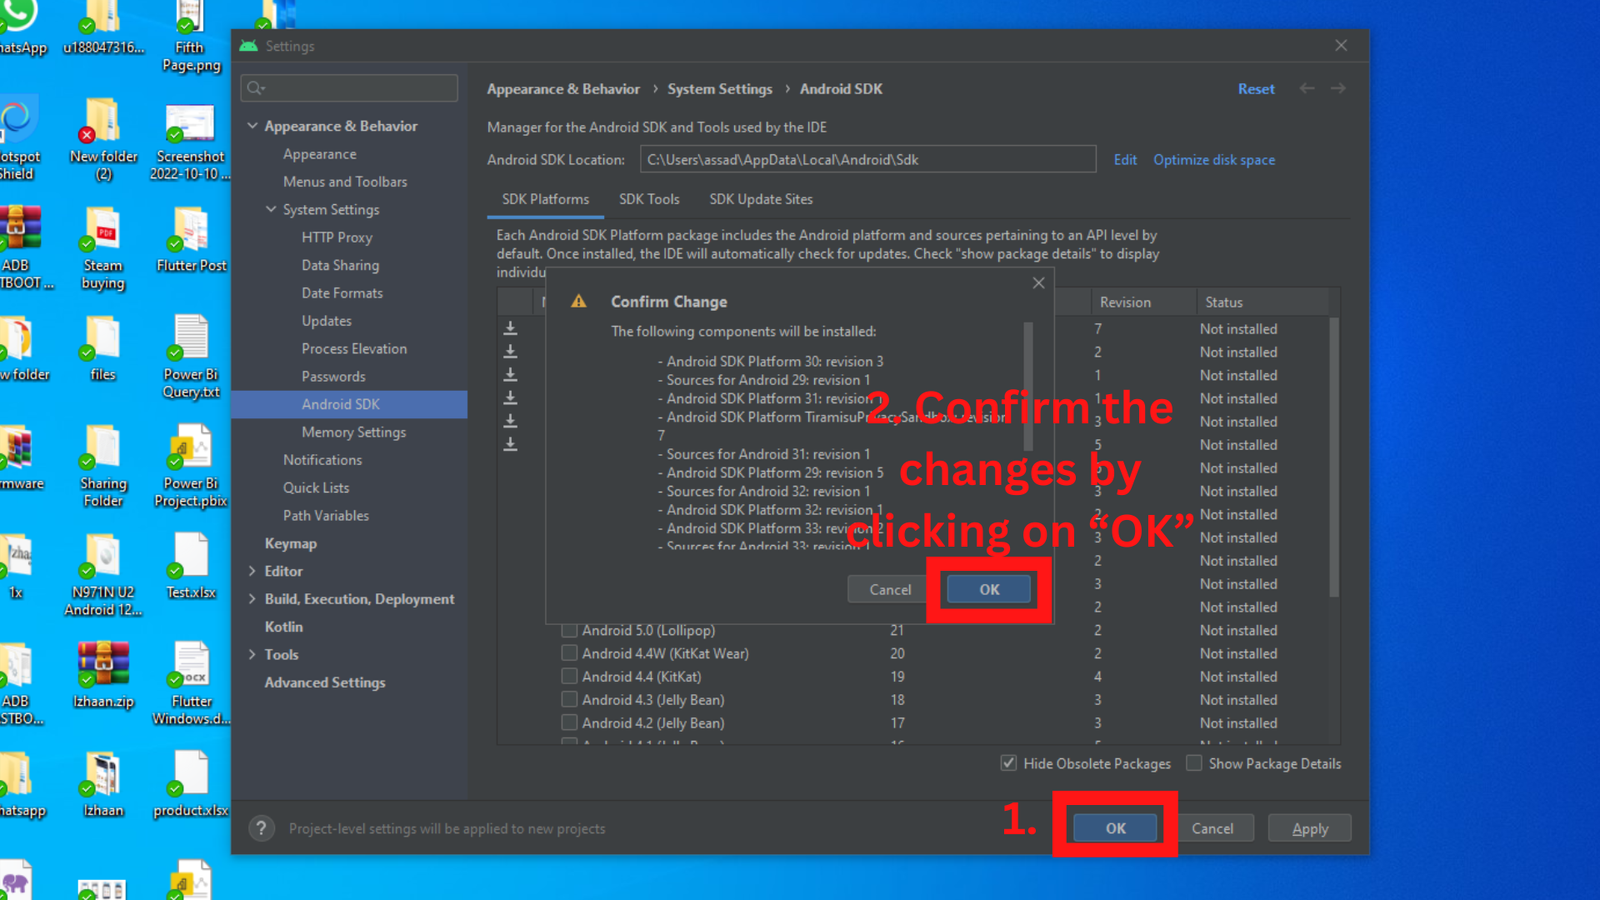
Picture 26
- Now, SDK platforms are downloading. Here, it may take 5 to 10 minutes depending on your internet speed. After the downloading is done click on “Finish”.
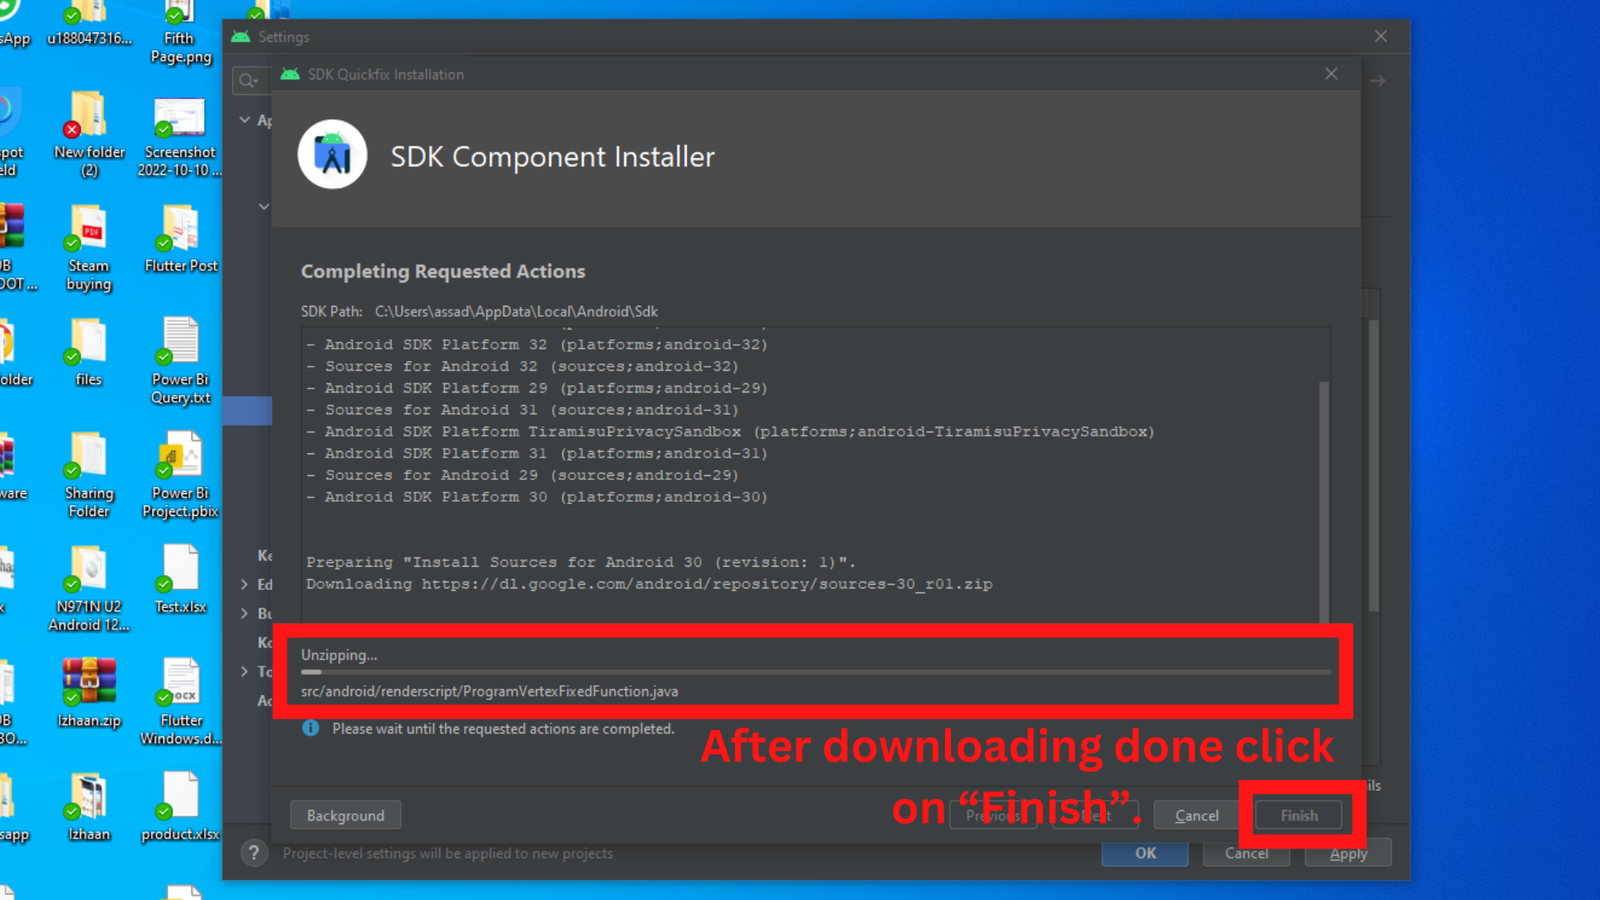
Picture 27
- Now, click on “OK” to close the SDK installer window.

Picture 28
- Now, here is the “Welcome Screen”. By clicking on “New Project”
You can create new Android project of also you can import existing project by clicking on “Open”.

Picture 29
You are good to go with Android Mobile App Development.
Recommended: Before starting app development installing the Android Virtual Device (AVD) is recommended for testing apps.
Here is the link for how you can setup AVD for Android Studio on Windows.
TOP 5 ANDROID STUDIO RELATED QUESTIONS
- Best settings for android app development in android studio?
- Minimum system requirements for android studio?
- How to setup Android Virtual Device (AVD) on android studio?
- How to setup flutter sdk on windows?
- Which is better Android Studio or Visual Studio?
Sharing is Caring, don’t forget to share POST with your friends


Comments